Finally arrived!!! Sometimes with currant world problems you may be waiting a long time for part.
Ordered April of this year and arrived in October after the season was over.
Litterly cutting it close, a few were down to the spider welds but we made it without affecting the ( QOC) quality of cut.
Love this cutting unit but not a big fan of the engine and controls.
As far as grinding and holding a great cut for long periods of time they are one of the best for our tees and approaches here at The Links at Brunello.
New Reels nice packaged .
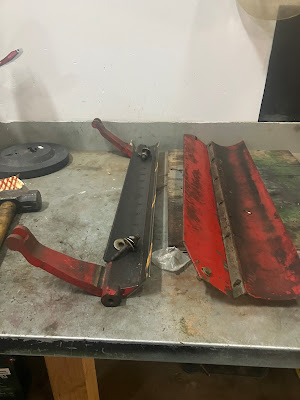
Old reel verses new. The back side welds are at the cut on two of them.
Start by removing bedbar and installing new knives.
Bedbar off
Remove belt drive cover. End of season here and these units have many hours and seven seasons on them. It's a good idea to do the drum bearings while you're at it.
See the vice grips. Brass insert failures are common (spin inside case). Try not to over tighten bolts when servicing may help.
Check all the shaft bearings and these idler pulleys for wear.
The pinch bolt is here for reel drive idler pully. Taking the reel shield off makes for easier to remove and or adjust. Leave shield off until this belt is adjusted.
Remove shield bolts
Leaving the bracket loose on the right side makes shield removal a little easier.
Adjust this bar back to its original location. Helps clippings go in baskets easier when reel to bar gap is adjusted. Set your adjusters back so about 3/8 ths of the threads are showing.
I have a long side bench to lay parts on. Big jobs involving lots of parts I tend to keep them together.
Circlip on reel drive gear just stays at it is. No need to remove.
Wedge a prybar here in the old reel.
Remove lefty loosy with a short half inch drive impact extension.
Remove cap bolts and cap on left side.
Remove large nut.
Seal surface on this nut .
Reel drive side has Allan head bolts. Use a good tool and clean out hole well and tap it on. I wound up just removing all the idler gears on the other 3 units later. Nyloc nuts on inside for both ends.
This small case has beveled shim washers. Don't lose them.
Easy way to wedge the bearing caps off. Unlike the old PGMs they all came out easily. Caps are the same but have different parts inside so rebuild one at a time. Yes, you should replace the bearings and all seals with a new installation.
Instructions say to remove these grease fittings before removing end caps. There is no need to go through the frustration, they tip out just fine after the reel comes out. Lots of room to slide reel to the right facing reel and have caps tipped out to remove reel out from left side (facing reel)
Like so.
Cleaning the outside before rebuilding them.
Laying out the new parts. You see one side has a wave washer and retaining ring.
Still well lubed and feel ok.
Like my seal pry bar.
Using two picks the bearing retaining ring came out pretty easy.
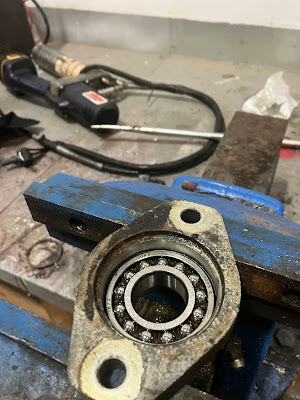
Double caged ball bearings tapped out ok.
For the couple up bucks replace wave washer with a new one.
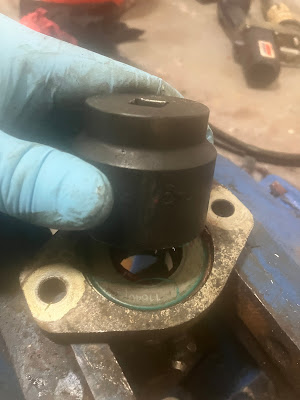
Bearing went in well. I just found the right socket (in this case) to push on the outside race section. If you tap it in on the inside race you will damage the bearing.
Once the new retainer ring went in, I tapped it in place with the same socket. (Spring loaded because of wave washer.
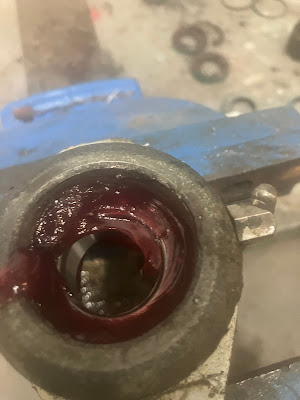
Grease before sealing. It will also be grease just before grinding the new reel. Yes, a new reel should be touched up.
The other side is the same minus the wave washer and retaining ring.
Ordered 4 new reel drive belt covers. Bottoms are worn right through.
Reel installs easily in reverse order. No issues.
Make sure the seal lips and gear shaft and retaining nut get a good amount of grease before installing.
Installing bedbar with a new knife is recommended. Also, you will need a touch up grind.
Grinding all four units when complete.
If you decide to install shield before belt adjustments it makes it difficult to tension idler pully for reel drive.
I'm doing a JD thing here. Lightly adjusting bedbar to pinch reel to a stop rotation before squaring reel to drum later on. Get reel to be centrally touching bedbar.
I have a drum bearing install on blog already and going to add or repeat.
Showing some or sometimes all the processes to get drum belt gears off. Wire brush and use penetrating fluid first. The above pic is my last resort lol.
A couple of light taps hit squarely on the end just to shock the threads may help.
Be very aware that some of these parts are righty loosy. Also wheel shafts have to come off first or it will ruin the gear. They are 2 separate parts.
I found the impact worked the best going back and forth till you see and figure out which way it comes off.
Mark which way when in mow direction. If you don't install them correctly the wheel shafts will come off eventually and also the gear pulleys.
Remove 4 bolts on both ends. comes off easy.
Get the machine up as high as possible so the drum can slide out.
Check the link above for further drum installation instructions.
Going to talk about random pics below.
Basically, the drums rear end so they can turn independently.
This drum mount will slide on shaft either way, the mount should face out. Technically you could rebuild it with this drum left on. In case you notice movement in and out that's ok, frame widths may be slightly different making for easy installs.
After install leave all bolts on but very loose. Going to my marble top for leveling and squaring reel.
Leave all the hardware and belts off drum drives till it's squared up.
Setting reel on precision cut spacer bar with front face touching. With the drum bolts already loose and the weight of the machine its self-squared lightly tighten bolts one at a time switching from side to side before torquing them on. Check drum where it meets bench plate there should be no gaps.
Like this. No gap you see between drums will fix itself when gear drum drive pulleys get installed.
Reinstall drum gear drive pulleys. If you had noticed no gap between drums before this will pull drums out to final location to get that gap. Thats why the rear end bearings is floating.
Install everything in reverse order.
Installed correctly. Debree plate goes in back of both bearing cap ends with grease fitting at bottom, front plate also has a relief dent for same location.
This was my take not paying attention and figuring it out according to parts book lol. I had the plate sandwiched between frame with debris plate behind. The only problem with this is that it didn't leave a big enough gap between the center of drums.
Hope this helps someone out.
Enjoyed doing this one.
Thanks


No comments:
Post a Comment