Thursday, September 29, 2016

JD 4320 front axle pinion seal

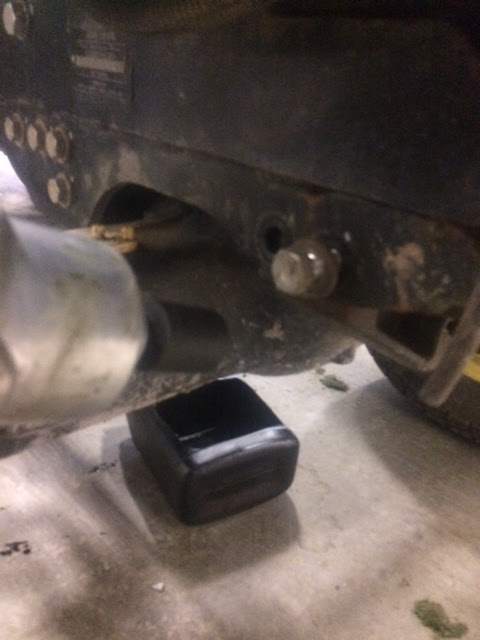
Our tractor developed a leak under the front axle .On closer inspection found the 4WD  splash guard tube had worked its way up into the seal . I try to use my lift as much as possible . This was the perfect way to line up and or remove front axle off tractor . 


Using a 4" tie down strap and doubling it up.Moved the plate close to uprights . leaving the box scrapper on the back gave it a little counter balance too . But probably isn't necessary . 


Loosening of the front adjustment bolt . 


Capped off hydro lines to steering ram . Put a tag on one to get them back in the same location . 


Remove the 4 bolts that  the Trunnion in 

 slide guard back knock the roll pin out of the sleeve .The plastic collar above holds the tube . Maybe its worn out and pushed through taking the seal out ?

You can line the pin up with hole in oil pan to punch it through . I removed both sleeves and drive shaft . 


Moveing the lift up and down a bit and a little wiggle on the wheels and it came right out . You might want to support one end on a tie-rod mount with a jack so it doesn't roll over on you .  


Check inner sleeves and seals and replace as needed on trunnion and oil pan . 


No issues with lift holding up front end . Place jack stands in front and let it rest on them . When moving it up and down watch your clearance on engine bonnet . Mine was fine the whole time . 


Kit came with new crush sleeve seal , O ring and nylock nut . 


Hmmm a bit of a problem . Have the right size but not in a deep socket . In this case I'll cut it down and make a specialty tool instead of buying one .Chances are this will be the only time I'll use this size socket 1"5/16.


Had some thick wall tube stock to weld sections together with . 


Remove nut 


removed seal and crush sleeve and O ring 


Shop made seal installer . Grease lip of seal . install sleeve and nut . Now come the fun part I didn't plan for . Lol turning the nut turns wheels axle and pinion .Also hole in framing won't allow a socket to get in after assembly . After trial and error I ended up  calling  a friend . After talking to Blayne I got a better idea on how to tackle my problem . 


Rolling the axle to my bench I was able to strap both wheels to the upright 4x4 . Next grabbing the pipe wrench (36 I do believe) attached it to the underside of axle housing so to would catch on shelf locking everything down . Took a good effort to get 210 ft lbs on the torque wrench . I was pretty happy to hear the click and clicked it one more time . 


The cap and tube got riveted together . reassemble in reverse order . Fairly simple . Locking down the axle for pinion torque was the true challenge . 

PS . I'd like to thank the like minded individuals that work for the various color machines that give out 110% to give us ( the end user ) minimal down time and great experience in our busy fast pace environment .

Another season coming to an end, aeration is just around the corner . Course weathered very well in the extra dry summer we had .
Still a pretty busy place . 
Get out and play the fine Nova Scotia golf courses before we put them to bed 


Tuesday, July 5, 2016

Z bender . Make your own throttle cable


Here at The Links at Brunello we hand mow approaches ,collars and Tee's 5 to 6 days a week . We have a small fleet of individually trailer-ed mowers . Having one go down is always a bad thing having to wait 3 days to a week for 2 throttle cables even worse . Recently 2 mowers went down and I managed to bend something on the remaining cable to get us by .  ( Very Lucky)
Anyhow I'm managing to keep spare parts to help eliminate downtime of certain items we seem to go through on these Toro 1600 mowers . 
Not hard to get them up and running having parts in stock . 
While waiting on cables I researched a small engine supply company were dealing with and found that they sold the actual cable that runs through  the sheathing . 
Great!! I can use the old sheathing and make some for back stock . Talking on the forums one of the guys had an extra Z bender in his tool box  and mailed it out to me . Thanks Bill ,from Florida .


One of my homemade bends , not much choice here cable was broken off pretty short . 
But it made it till the parts arrived .


Very basic tool push end in hole and pull down to make a 90


Then roll it around to the slot


and pull up . 


Turned out pretty good 


If the sheathing is good slide it back in with lube on it and put in parts room . Not the first time we broke one . 
cable $11 for 100 ft . 
Big savings !!

Friday, May 27, 2016

JD 7400 tier 4 engine issue

A few days ago, one of our best operators (Danny) came in and mention that it stopped mowing and wouldn't pick up any speed. He had it out for a few hours prior. With all the sensors on it and so few hours...Nick (traveling tech) for Reddin Equipment came by to check out the issue. Hooking his laptop to the machine and checked settings etc. determined it was a bad DOC outlet temp sensor.
 We have a lot of rough area to mow and need every unit out and mowing as much as possible just to keep up.
Down time is not an option. The part was located and air shipped next day. PERFECT.


Sorry about quality of pictures but when I see parts to put on I'm on the move even if it's 4:15 am.Sensor on the right was gone. Actually, could wiggle it around. New one in.
Old one out.

Nothing makes a mechanic happier than a quick turn around with a much-needed machine.
Thanks, Harold Larter, for making it happen and Nick for finding the problem.


Ben is out with it now. Great guys here at Brunello. They are good on the gear.


Thursday, May 26, 2016

JD 7500 verticutter front roller scrapers

We have the wire that cleans of the rear roller .The issue is the verticutters throw the clippings forward for the front roller to pick up . It will increase the front roller dimension by a good 1/2 ".After looking in the parts book I didn't see clearly if there are front scrapers available . Being in a new shop there is some left over building materials.  I happened to save a bunch of 5/16th threaded rod .


Perfect and the price was right . The front rollers are set for the +  -HOC that we use and most likely will never change . As you can see in above picture there is a space just big enough to get the threaded rod in the front roller arms . 


Fairly simple to do only took 45 min.to do a 5 set installed .


Thread the nuts on a fair way ,more so on one end to slide in place with a backer washers . Then washer lock washer and nut on the outer end . Tighten the inside nuts till their just touching the washer and roller arm . As the outside ones are tighten it will draw the threaded rod tight . 


Cut excess off . Turned out great and pretty easy to do . Now the clippings will get trapped on rod and wipe roller . Excess clippings will drop off the back . 


Saturday, May 21, 2016

Torque Multiplier

I've been looking around for a tool to torque the rear tractor wheels on the 5055E .Specs  say 405 ft lbs.I did get a few quotes for tool ranging anywhere between 700 to 1000$.A bit pricey for a tool that would rarely be used . Princess Auto had one for $119 on sale a while back and rated for up to 720 ft lbs. torque ratio is 1 to 3.3 . 


Needed a piece a fence pipe to anchor one end . Setting the torque wrench to 122 FT lbs made quick and easy work of it . Good thing I checked after it came back from warranty work the right side wasn't quite torqued enough . That's normal they should be check when removed after the first use . Also used it to replace some worn out pins on the box scrapper .

Sunday, May 15, 2016

The Links at Brunello May 2016

A few picks of the course . With a great winter season most course are looking good . A blessing after the previous harsh winter . Every ones of to a good start . 
Have a great summer.
Things are ramping up !!!


Must play course .Looks like July out there !!


Rotary Lift traction fix

Love my Turf equipment Lift , the only issue is the factory traction paint doesn't last long . Especially when adjustments are done to most machines after they come in off the wash rack . 


You can see the paint gone from spinning tire to get on and off the lift .


Started by sanding the paint down to bare metal. 


with the MIG it was easy to run raised beads on wheel buckets 


Just the leading one needed to be done 


Finished took 5 minutes 


So easy to get our JD 2500E on the lift ...even with the smooth tires .
Effortless !!!

This was another great indirect Twitter post find . I noticed some had done it to their lift in one of the pictures . 

Great idea . 
Once a year they may need re-beading as they smooth out or wear . 


More rack builds


New shops require lots of racking to make permanent homes for equipment . Most the the racks I'm making can be moved if needed .


We have commercial racks left over .I was able to cut down and weld them to fit 6 
Hover mowers 


Weld screens on for extra strength 


Turned out really well and gets them off the ground . 
One more prodject to clean up another area when time allows . Maybe a winter project . Things a ramping up . 


Thursday, April 14, 2016

More Fabrication Jobs ( Racks for landscaping tools )

  
Having a new shop keeps a guy busy . It's almost go time and the guys and machines are raring to go . Had some time this week to make racks to clean up the landscaping tool area . 


Our irrigation expert (Rob ) started the project last season but ran out of time . Great design on the holder bars which I reused to strengthen things up a bit . 


Making a second rack to hold the speciality items 


In the process of trying to get it right the first time . 


Added a few extra pieces to make them take up less space . 


 One of the landscaping rakes had a long reach handle . Added a few more bars to get it on . 


Organized easy access .  24 ' of racking .


The forward legs are reinforced . I can actually grab any 2 bars  pull myself up without any tipping hazards .