Monday, September 24, 2012

Ok I'd like to cancel my rain order .

 We had a storm hoovering of the coast this past week - end 09/22,23/12.It dumped up to 200 mm in some areas .
 A few picks . From #6 pond looking towards #4 fairway.
 #10 green and pond are one for now .
 Pond at 11 Tee over flowed and this is by right side of #11green heading for #4 fairway.
Here I am retriving the Smithco . It has the plow on the front to push up the sand in the traps . The gardener wasn't happy . Starter spun the nut holding the beddix gear on , and fell off . Last time it took a few days to get one .  
SOOOOO......Thinking on the fly I managed to put a bolt in crankshaft pulley . It has to spin counter clockwise ( rear side of machine ) to start  and it took a bit  for the nut to jamb the bolt on the crankshaft plus taking the tension off the belt helped roll it over easier . My large gear drive drill was just enough to start it up . ( leave the key on and choke a bit )
 
You can barely see him leaving up behind the sidewinder .He got away on me before I could get a picture . He was one happy camper . I just told him not to shut it off and leave it in the shop when he was done . Sometimes you have to improvise to get thinks done . We did manage to get the tees , greens an aprons done . Will have to wait for the course to drain another day to get the rest mowed . I'll be chipping in tomorrow on fairways to double cut them getting things back in order . 

Wednesday, September 12, 2012

Toro 5410 reel bearing replacement


We had a rain day at the first of the week and it was a perfect opportunity to give the fairway units a quick spin grind to get me through the rest of the year . On the 8th reel I had a horrible noise from the grinder . I did check the bearing but seemed to feel ok . The grinder will tell you for sure if it's gone or on it's way out . Here is what it sounded like . I'm not grinding at all just spinning the reel.
 When removing the reel you only have to work from the left side on any 5410 reel ( drivers sitting position )
 Remove bedbar first . You can just remove or loosen off everything on the left side , rollers , brush kits, scrappers etc . I like to take all the rear roller and in our case the brush kit off on both sides .
 Removing this bolt will take the rear grass shute off .
 Next I loosen of the small box head bolt and back the reel end play nut off 1 full turn or more . There are only 2 shoulder bolts hold the end case on to back frame .
 I had to remove our front roller bolt because of the roller scraper .
 When you take the shoulder bolts off don't lose the nuts . They slide into the back framing .
 You should be able to wiggle it off . If not get a rubber mallet and tap it here .
 And here and it should come right out . Bearings are pressed on reel shaft .
 It comes off pretty easy .
 The other end I just take a piece of hardwood and give it a light tap here on the right side and it will fall out of the side case .
 It's out ... bearing and seals are on the reel shaft . The reel drive splines can stay in there, there not in the way .

Bearing looks good . lots of grease .

    Here is what they look like . It's called a self centering bearing . Was quit surprised the first time I saw it .
 Using painters tape to mark the direction that it came off . I like to put things back the way I took them off .
 I don't have a press but this puller I use all the time for removing bearings , seals and many other things .  
The seal easily prys off . The seal only goes on one way properly ( the metal side faces the bearing ) 
 On closer inspection the bearing was in hard shape . These are a double ball bearing type in one race . The back set of bearings fell apart .
 When installing the new seals they have to sit .060" away from the c-clip . This way they will sit inside the side casing when assembled .I prepacked the bearings and there should only be grease on the outside edge surfaces of the seal and bearing for assembly  . I have no press here so I have to find a 3/4 inch drive socket that will fit over the reel shaft so that I can tap it in only on the inside bearing surface ( closest to shaft ) If you try to tap it in on the outside you will ruin the bearing .
 This the right side case . I found it easier to get the left side in the case first and then line the bearing squarely in the bore of the right case a give light taps on the left case to get it back together . Reassemble everything in reverse order using manufacturers torque specs . You can find all this info on the Toro web site . Quick break down on assembly shoulder bolts around 33 ft. lbs . everything requires lock tight I used the medium (blue ) The large end play nut 1 3/8 ths nut ? torque in to 25 INCH LBS . and back off then re torque to 15 INCH LBS. Rolling torque was around or should be 10 INCH LBS. Then lock tight the square head set screw and torque to 15 inch lbs .
After I ground every thing and put the bed-knife back on and adjusted it to cut I checked it on the bench plate to see if the reel was still line up with the rear roller . If it's not you can loosen the shoulder bolts in the side plate and there is a slight wiggle room . Both of the ones I did were ok .
This machine has 900 hrs. on it . Greased very well and it just goes to show me how rough the fairways are in some areas on the course . Going to have to put the 5 lbs. mauls back on the machine again .

Compared to other makes and models I found this set up very easy to do after the first one . Nice job .


Thursday, August 30, 2012

Summers winding down


Most of our students are leaving this week and next . We will be down to 6 or 7 staff to finish the season out . The grass is starting to slow down with the cooler evening temperatures . We will be on the move hopping from one machine to the other to get the cuts done on the course . This is the time of the year that I get my Minni break ( 4 day long week-end ) Everything is running good and all cuts are set up . So the crew is good to go and I feel quit confident that their shouldn't be any issues .
 This year I'm starting my break with a special treat . During the summer I participate in raising money for the cobequid service center .

http://www.cobequidfoundation.ca/?q=node/62


A Grand Day for Cobequid

3rd Annual Grand Day for Cobequid Raised over $75,000

On behalf of the Grand Day Steering Committee, we would like to thank all the participants, sponsors, partners and volunteers for helping make the 3rd Annual Grand Day for Cobequid a success! This event would not be possible without your support.
We have come a long way from the dream that Peter Korecki had while sitting on the end of his dock 4 years ago.
Together with our volunteers, sponsors, participants and partners we raised $75,325.
This will help improve patient care here at Cobequid and will go far towards funding our Steris Reliance Endoscope Reprocessing System.
For more information on Grand Day 2013 contact Ondra ondra.maclean@cdha.nshealth.ca or call 869-6128.


 12 k  kayak run on Grand Lake . It's a pretty good time and I happen to win these guys below . Off to a good start . Then we go to a 3 day holiday on the beach listening to the surf and enjoying the fresh air   . Totally relaxing after a busy summer keeping things sharp and running . My boys and their family are welcome to join us every year if they like . We're going to have the 2 grandkids here this year . Should be a great time .
  Not cheap but highly recommend it .
 http://www.quarterdeck.ns.ca/index.htm


Are you ready to spoil yourself? Then welcome! The Quarterdeck Beachside Villas & Grill.
Imagine strolling along a mile-long white sand beach, the sky pure blue, the ocean gently lapping the shoreline, in rhythm to your heart. Imagine relaxing in a luxurious Villa that nests right on the beach, moments after a refreshing jacuzzi. Stars twinkle in the calming, coastal night sky. Imagine feasting on the freshest Nova Scotia seafood while sipping fine Chardonnay followed by an authentic Nova Scotia blueberry cobbler. You're miles from the ordinary. You're a guest at The Quarterdeck Beachside Villas & Grill on Spectacular Summerville Beach. And you're ready to be spoiled! Canada Select

© The Quarterdeck Beachside Villas on Summerville Beach 2006

AccommodationsRestaurantAmenitiesReservationsLocationArea InterestsGetaway SpecialsGift CertificatesGift CertificatesContact Us
 Gives me a little boost to get through the fall .
   Next up aerating , deep tining , top dressing , aerovating fairways and then tarping greens . All in the next few months . Just have to get through September first .


Wednesday, August 29, 2012

Cushman front frame repair ( upper control arm )

 The gardeners cushman I noticed when it was going by that the front wheel on one side was back further than the other and when he backed up it would straighten up again . After closer inspection I found the frame had crack and a few pieces where missing . I had to heat it red hot and use a bar to beat it straight to line the cracks back up for welding . This is an older machine and the front frame retails for around $2,000 so this repair is the only option . Remove tie rod off spindle . Remove the shock strut . The bolts may be seized to the rubber bushings you will have to work the bolts back and forth with lots of penetrating fluid . You can remove the upper control arm to frame bolts . I didn't find any need to remove ball joint nuts off spindle . I was able to move it to the side altogether for the repair .
 Disconnect battery before welding .
 After welding up the cracks I made up another plate ( same thickness)and drilled the hole out for the upper control arm mounting bolts and welded it in over the bad area . Install bolts and washers to hold plate in place then weld in place .
 Remove the bolts and washers and reassemble . Replace any shims that came out , you may have to remove a few shims to align it up better .
 Reassemble parts and replace any cotter pins with new ones .
 
Turned out ok , I may still have to remove 1 more shim . A few years back we did the same repair to the other side . I find cushmans tend to rust quickly around here so it may be wise to get some rust check spray cans and spray the frames down in the off season .Our new one is rust checked every winter and so far so good . When you see patterns of wear or conditions that can  wear out a machine prematurely try to figure out if there is  anything that can be done to  slow down the process .  This is a great hauler if you keep an eye on the frame you will get many years of trouble free service out of them .
PS. A lot of repairs at our ( golf course ) level  may be reflected by budgets / age of machinery / skill level and resources . At a dealership they would most likely suggest replacing the frame . In this case it's not so much the budget but the age of the machine versus it's worth/overall condition and the cost of the part . If I though buying the new frame would get me 5 more working years out of the machine it may be worth the expense . But in this case it is not .


Friday, August 10, 2012

Club Car front leaf replacement

 One of the guys brought it to my attention that the Club Car he was driving suddenly bottomed out on one side . He was a little concerned that it was his fault . I told him that it was an old machine and it was just wear and tear and it is an easy repair and I also thanked him for telling me . This is the way it should be . Reporting machine problems right away so they can be dealt with . Some times damages are caused from horseplay and sometimes it's from normal wear and tear . If it's horseplay  mention it to the super so he is aware of a problem .
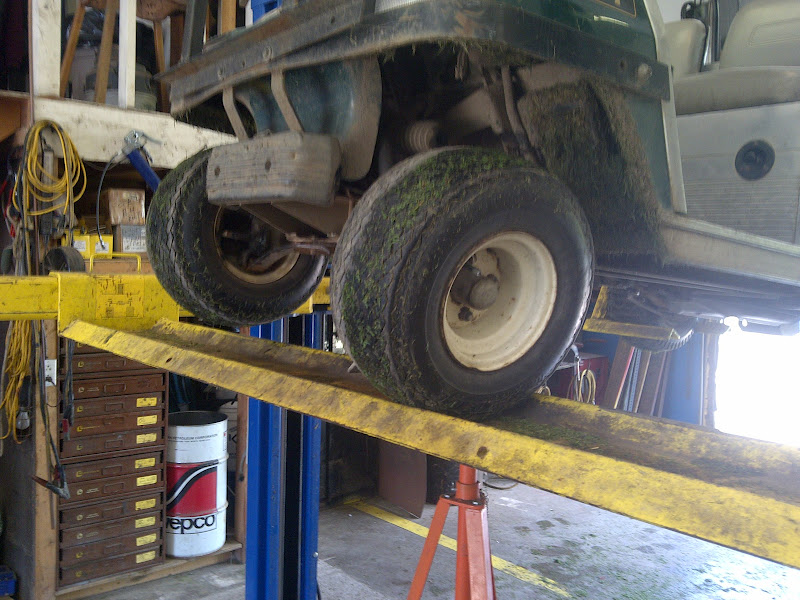
 It drove on to the lift with no problem . I put it on this way so I could put a bar across the frame supported by a jack stand . The reason for this is if something dropped it would still land on the tray . Nice clean break . Do not weld back together . They are fairly cheap to replace .

Placed the jack stand at a comfortable working height and then dropped the lift 1 notch .


Not to much to changing one out . Pull the wheels and then take the leaf spring bolts out . Remove the 4 bolts in the center plate to drop the remaining leaf spring parts .

 I reassembled in reverse order . There is an eccentric bolt for spring adjustment so that the tires will sit straight up and down . I couldn't get the bolt off and wound up snapping it . I have to eye ball it till the part comes in . I did put a bolt in it's place temporarily .
Raise the lift after your done to get it off the jack stand . Looks pretty good . I took it for a drive afterwards and I always do some figure eights to see how it feels . I just have the 4x2 gator laid up waiting for parts . Repair time less than 30 minutes . Even if everything was seized and you have a bolt bin then you could cut any troublesome bolts off with a torch .