Friday, March 13, 2015

Last Day at Ashburn

Going to miss this old shop . Put a lot work into it over the years to making it a functional equipment maintenance shop .Spent the last couple of days cleaning things up and getting rid of any confusing items around ( we like to pack rat in this side of the business) that we saved for a rainy day or reuse to make something else . When I came here from the New course 13+ years ago it was in need of a lot of upgrades to bring it into a modern day shop it is now . The club has spent the money to increase productivity and ease of maintaining equipment . Also another big factor is that the equipment manufacturers have improved their respective gear for maintenance . Hopefully the new technician  is from this field and will easily take over from where I left off . But we are a rare breed and can be hard to replace . Most likely it will be a mechanic from a different field that will have figure things out as he /she goes . Hence my blog . When I first started there wasn't much information out there and learning from the school of hard knocks can be trying in this go..go.. environment during the growing season . Even higher now with the demand for perfect course conditions of the modern day golf course.
I tried to make it as easy a transition as possible labelling items and their use plus leaving my note book for the past 2 seasons will be a huge help .


This area needed attention to get the used filter bin out of the way . Looks better now . Filter charts etc. are all up for equipment maintenance . The trick is being able to develop the skills at trouble shooting and setting up cuts on equipment while dealing with daily mechanical repairs that come in .( routine part of the job )  some are repairs or adjustments and other times it's a little retraining to resolve an issue . Hopefully they don't run when they read my Monday routine after the weekends . Lol 


Lifts all cleaned up .Recently inspected .


Floors cleaned up even in the nooks and crannies .


A few more pictures of the shop 


Hydraulic hoses making station .


Grinders serviced and clean ready to grind when needed. I like to leave them covered .Looks like it might be a while before their used again . Come on spring. 


All ready to go for the next Mechanic .


Place looks great .


Starting at The Links of Brunello on Monday .
Looking forward to the new challenges laying ahead of me .
Not often if ever does an opportunity like this presents its self in this business and area .  

Monday, January 26, 2015

Toro Front rotary deck roller rebuild


During the winter maintenance I knew the front roller bearings on the sidewinder were on their way out . The bearings felt dry and rolled very easily . I managed to make them last by spraying cable lube around the bearing area hoping the grease would solidify inside the bearing . Now is a good time to replace them before the bearing lets go completely . They are very hard to get them out if it happens plus the shaft ( bolt ) will be damaged .    


Started out by using a piece of 3/8 mild steel rod and driving one bearing out . 


Using the press to push the other one out by using the spacer sleeve inside roller . 


Pic of sleeve


Using a small extension and socket that match the shaft . Invert the socket like this keeps the business end from getting damaged .


The new style bearings are to be driven in with a special tool . My impact 1 1/4 socket was the perfect fit . As long as it doesn't damage the casing on the bearing and pushes evenly on the outside edge . 


New bearing number


Inner spacer shaft looks pretty bad but its mostly built up grass clippings ..came right off on the wire wheel .


Both bearing out .


I like to put grease inside cavity before installing bearings .


New bearing on the left . The're a little beefer. 


Press in the first bearing 


Lining up the inner spacer and bearing using the shaft/bolt.


I'll press in the second bearing .


Check the shaft bolt for wear.


Non grease-able bearings ..so during the season I use cable lube .Some gets in when it's liquid and gels up inside . I did get over 2000 Hrs. on the old set . 


Put some med (blue) loctite on the treads and re-install on machine

Tuesday, January 20, 2015

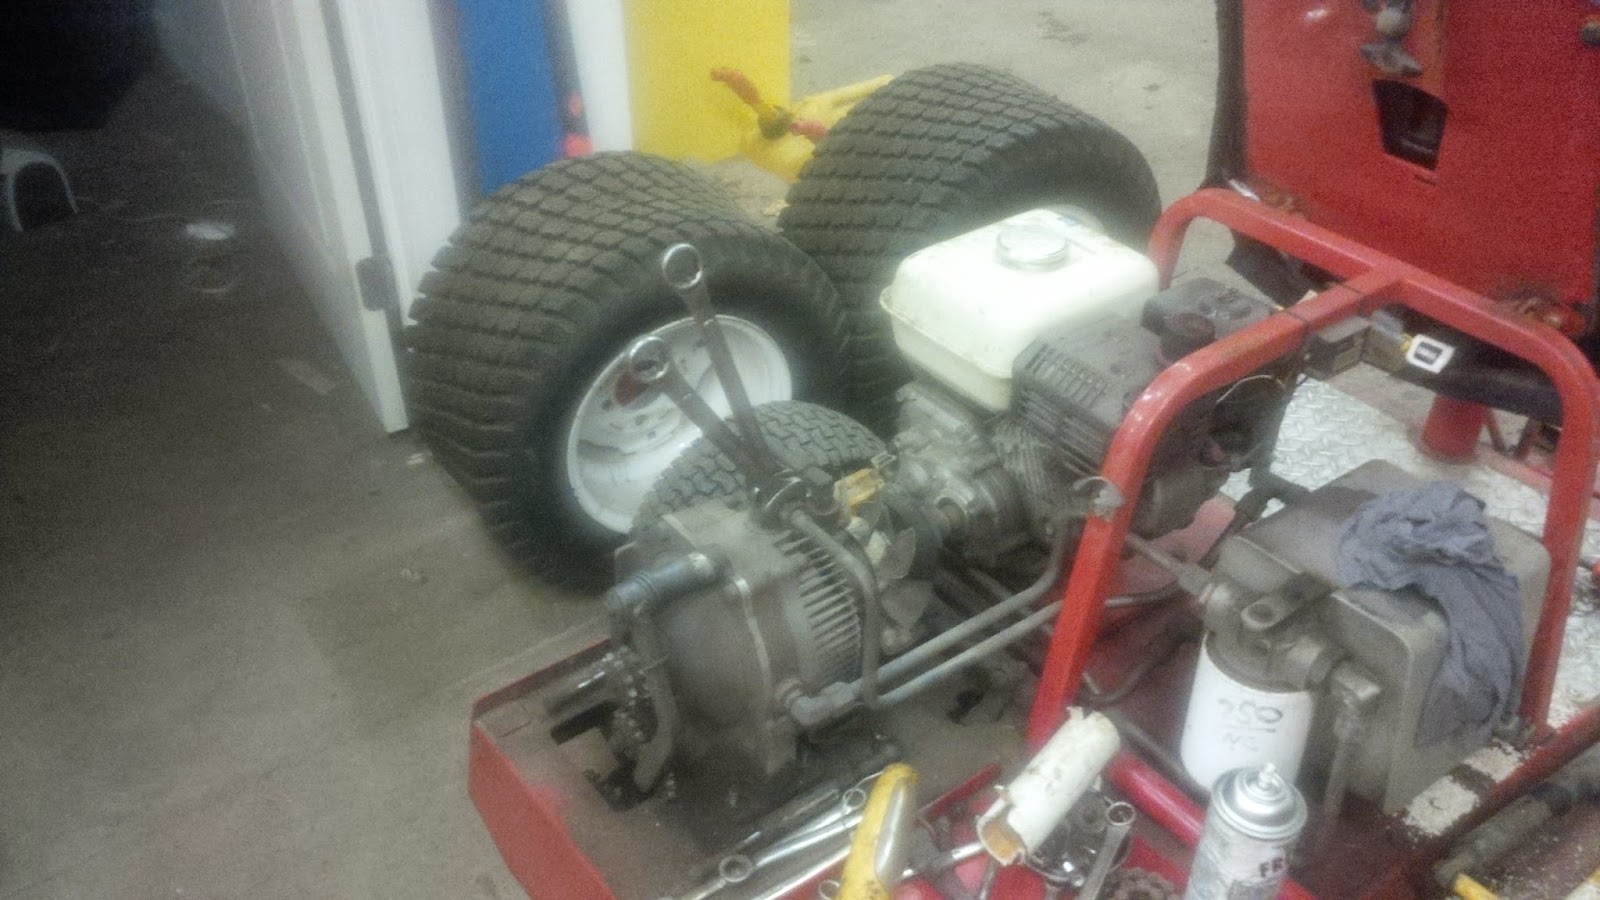
Tru-Turf drive gear shaft repair

Our Tru - Turf roller drive gear has a lot of movement . Ordered the necessary parts for repair . Parts took months to come in . I'm glad it didn't start leaking . Laying up a roller during mid season wouldn't be a good thing . 


 Here is my home made drain extender .

Disconnected the drive coupler from engine 


Remove the shock linkage on both sides and double link chain . . 


Loosen off all 4 lines at pump 


remove bolt for pedal linkage and 4 base nuts on pump ( studs are welded in on underside).  . 


Lift up a carefully pull out making sure not to damage any steel lines ,.


Clean up in parts washer bin .


Fit pretty good in my large drain pan ...trying to avoid spilling oil everywhere. Remove both chain tensioners 


Remove drive gear bolt and and  key most likely will have to be replaced . There is a lot of torquing back and forth .  


Next I removed the 4 bolts that hold the bracket in place .


Tensioner bracket. 


To split the pump there are 2 torx head screws that have to be removed 


  Pull pump apart by hand . There is a rubber seal between the halves . There are 4 large pump balls that you want to keep in place .


 I wrapped a rag around them and covered it to keep it clean . 

 Now we are at the problem part .


New parts . After waiting many months the wrong shaft was delivered ( single gear ) ? How does this happen when you order from an OEM # I'll have to make it work ...Not having a roller in the spring is not an option . Most of it is keyed on the first section . Dealer was contacted about the problem for records . 


Remove the cir-clip holding the shaft in place 


Pushed the shaft and bearing out with the press .Could easily be tapped out with a hammer 


Remove the old seal 


New seal sits flush in bottom . Using a socket this way works great 


New seal in place .


 Pressed in the new bearing . and pushed new shaft in and installed cir-clip.


Installed gear and new key . Notice that it was a little short . 

  
Shimmed up the gap and installed a longer bolt .


Assemble both halves and re-install torx screw  to hold pump halves together . Reassemble I reverse order . Change Hydraulic filter and new fluid . 


I was amazed on how much wear took place . Old bearing wasn't seized and in good condition . seal was also in good shape .