Friday, December 23, 2011

GK IV cable steering slop

 I have a little play in the steering . Unhook battery terminal +. Remove tank and tank support .
On this one the key way is a little worn on the pulley . Replaced the key cleaned up and re assembled . The machine has over 10,000 hrs . Not worth buying a new pulley .Seems good now . If it's still a problem I might have to use some JB weld on it next time to tighten up the gap .A better fix would be to drill a hole 180 degree from the key way and tap threads for a set screw .

Tru - Turf Roller steering rod ends

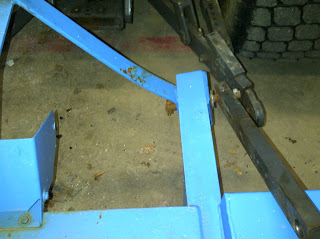
 Love the lift much easier to replace the rod ends .
 This is what I'm replacing them with . A little beefier than the stock one in the lower pick .
The roller is used a lot . This roller does a great job but needs some regular maintenance in the off season so it doesn't let you down when you need it  . The roller bearings only lasted less than 2 seasons , but last time I repacked the sealed bearings with swepco 103 and after getting a season on them they still feel very good . this year I'm replacing all the steering and linkage rod ends and rear centering shock ends and washers . We find the double roller chain wears fast also . I did find I can buy it by the 10 ft. roll from Lawsons @ about 13 $ a ft. I should get 3 uses out of a 10 ' roll  instead of around 70 $ + for one chain from supplier . 80 $ savings . Could get it lower if I do some real digging on line .
     Wash it off well after use and the wearable parts will last a little longer but this unit is kicking up sand causing most of the premature wear . Over all a nice machine but needs TLC to keep it that way . Parts are easily replaced .

GK IV HOC over 7/16 th


Here is a pick of the difference in the front roller adjusters to get HOC over 7/16 th . I needed to get .500 but wasn't able to get it with the stock ones . To go even higher you can use a 2.5 " rear roller . My stock 2' were fine for what I needed it for .

Monday, December 19, 2011

First day back

The guys couldn't get the loader starter and left the note on my white board . Cleaned of connections / topped up the battery and found  the connector on the black wire on the starter was pretty much corroded off . Seems to be working Ok now .
 Our pro - gator had a few more wiring issues . If your pro - gator ( gas ) turns over and there is no spark it may be the 25 amp fuse holder behind the front grill panel .  Both - 25 and 10 amp holders were in very poor condition . I wired in some heavy gauged holders . I'm starting to think that machinery parked near fertilizer ( stored in the same building ) seem to have more issues with wiring connections . It was stored beside the fertilizer for a few years in the past .

 The last sprayer was tank flushed and ran some plumber anti-freeze through it today. It also had issues with the booms and agitation pump not working . The problem was in the 4 block fuse holder in front of engine . Corrosion . Just had to clean it up and replaced a couple of fuses .

Aerovator off the tractor and putting snow blower on today . Had a little bend in it . I tried heating it up with the oxy/act.but ran out of gas . We have this huge monkey wrench and with a little weight on it and it straighten out .
Guys are all out getting the last of the ice shields on and are finishing off a few jobs before lay offs this week .
 29 hrs. on the GK IV to bad it's on its second time around . Used this machine for approaches and collars this year .Had to get the extended front roller adjusters to get the higher HOC. ( I'll get a pick of them if I remember ) We got it from the New Course and it works very well .
Getting reels ready to grind . One reel spun in , 3 bedknives done . I believe this unit is an '89 . One good thing about the old GK IV you get your moneys worth out of them . 

First day back .....an average day ...... not a bad day . 


Sunday, December 11, 2011

Lift Safety Inspection .

My lift is a year old this month . Received a call to Friday morning for the annual safety inspection . It's good to have some one come in a check it over to make sure there are no hidden issues . The inspector ask me how it was working and I mentioned that once in a while it seemed to be louder and vibrate more. He pointed out that where the 2 parts slide on  the nylon blocking needs to be greased by smearing a half tube of grease on the metal on each end . I assumed to would have been done during installation . I'll have to go back and read the manual again . First time having or being around a lift so I learned something new that day . Inspection went well he had to do some minor adjustments . Makes you feel more secure when it's working hard all season . Fantastic piece of equipment . Speeds up down / adjustment /and maintenance times for sure .

Thursday, December 8, 2011

Gel battery for my Toro pro - force Blower

 I have had this ongoing problem of acid leaking out of the battery since new, rotting the cable ends off ( replaced them 3 times in 2 years ) and ruining the paint on the battery box . Mid season the battery has to be topped up because of the acid spillage . Our course is very hilly and bumpy . The battery is not overcharging , the spilling is coming from being shook around out on the course . The blower is 2 years old and looks mint except for the battery area .
I did some research and found the best option for this machine would be to get a gel style battery ( sealed ). the trade of is it cost double the price of the regular battery . After getting the supers approval I ordered one in . Scraped and repainted it today , hopefully for the last time . Now I won't have to look at puddles of acid under this machine any more . The old battery will be great as a jump battery or reuse it for our  loader . I also removed the original battery casing that surrounded it .

1999 Cushman truckster 660 gas clutch replacement .

 First time doing this job on the lift . Took about 2 hrs + - . I have remove the transmission a few times using jack stands . I start by removing the battery cables on the battery . Next I'll disconnect the shifting cables on the transmission  I think it was 7/8 nut and pull the clips . Remove the clutch cables .
 On the passenger side there are a bunch of ground cables that have to be removed from transmission .
 Remove the 3/4 " nut on the rear end drive shaft yoke . Don't lose the special washer in behind the nut . I used a large pry bar in the universal joint to hold it steady to loosen off .
 Next I place the tripod jack under it till I'm ready to pull it out . Remove the muffler hanger of the transmission bracket . Next I take the 4 bolts of the top of the transmission bracket ( I'll show you in the pics below ). Remove the 2 - 10mm bolts that hold the inspection cover . Remove the cover plate . If your under the machine facing the front there are 2 nuts on the backside of transmission .. one top right ( remove it from under the machine it's a tight spot ) and the other bottom left . There are 2 bolts on either side of were the starter came off .  Now in the book it says to remove the rear transmission mount , I leave it on it helps hold it there till I'm ready to remove it . The drive shaft will not come out of rear end unless you lift up and to the passenger side . now your ready to wiggle the transmission out ( I removed the gear oil to lighten it up a little and prevent a mess . ) The manual says it's a 2 person job but I'm able to do it alone this way with not to much problem . Transmission I'm guessing weighs 25 to 30 lbs.
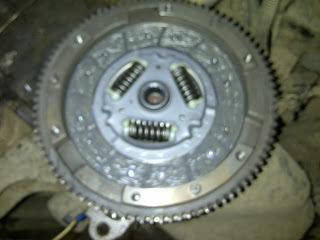
 Clutch and pressure plate on motor side . I placed a piece of 2x2 to on the top side of the oil pan to keep the motor from moving back and forth . There is a metal spacer that goes around 3/4 of the bell housing . You can remove that also .
 The right side of pic still has the transmission mount on it . I leave it on because it helps me keep it in place when it gets reinstalled  . The metal looking levers on the right side sit in a similar piece on the machine sort of like a cradle.
 Remove the 6 or so bolts holding the pressure plate on the flywheel .
 It's a fairly good size job so I usually replace the throw out bearing to . Slide the bearing of the shaft by pulling the clutch lever . To get the bearing off the arm ( in this case ) slide the clutch shaft in to release it off the pin on the bearing .
 New throw out bearing . I put a little never seize on the shaft to help it slide .I had an e-mail recently pointing out that the spring may not be fully connected and they are right . It's suppose to attach to the catch in the casing on the left were the shaft comes through the case . ( Thanks for the e-mail )
 Originally I though the clutch was worn out but when I removed the pressure plate I noticed in one section the spring was broken .
 Clutch alignment tool . I have had good success using a broom handle to center the clutch while tightening bolts on the pressure plate . 
 Check the bearing for wear . This one actually has a bearing . A lot of machines have just a brass bushing . Clean of the flywheel and scuff it of with sand paper a little bit to get the glaze off . If it's blueish looking and scored your better off replacing the fly wheel . You can take them to a machine shop if their not burnt and get them to turn a little metal of .
Set the clutch in ,Face the side that sticks out towards the transmission .
 Clutch alignment tool .
 When I'm ready to place the transmission in I set the tri pod on the front side of the motor for support. If your alignment is dead on it may just slide in . If not wiggle it back and forth and up and down . If it's still giving you trouble and the the transmission shaft has started in the clutch you can put one of the levers in gear on transmission and stick the drive shaft in and give it a bit of a turn till you feel the teeth line up , Then you can push on the clutch lever and it should slide in enough to get the bolts in . ( Don't forget to put the spacer plate in on engine before you start installing transmission ) tighten bolts and nuts up evenly till its back in place. .
 Remember my cradling levers on the transmission . I have to push up and to the passenger side to get the drive shaft back in place . ( pick below )
Now you can install every thing back on muffler hanger, transmission bracket bolts , rear yoke bolt and special washer , clutch cable , shifting cables , ground wires ( clean them well first ) starter and wires . hook battery cables up . Put the inspection shield  back on . It should be good to go . This one is.The Gardener couldn't be any happier . He loves his Cushman being Welsh and all .

Wednesday, December 7, 2011

Cushman clutch job next

Just finished up the Toro 3150 Q. I was planning to bring in the GK IV next but the gardeners Cushmen truckster has a clutch problem . Slipping really bad . I know it's not the clutch cable being to tight . I replaced the clutch etc. back in  2005 . It's all apart and will have some pic's later . Hopefully have done in time to go on vacation . Going to have to get the tractor mounted snow blower on tomorrow and plow gear ready for the Christmas break . Most likely I'll be plowing unless we get a break from the snow like last season .

Accu gauge bench setting .

 I prefer to use the accu gauge on HOC ( height of  cut )under .500 " ( 1/2 " )
I'm bench setting this reel . The actual HOC will be lower when it's on the rollers in mowing position . Other things that affect the HOC are the grooved  rollers on the front of some reels . You can get as much as .05 to .20 difference between the smooth and grooved rollers . Some course like to use the smooth rollers in the spring when the grass is just starting to grow or having problems then they will switch to the grooved ones in the summer to get into more of the canopy .
 The wrench facing us loosens the adjuster the other one on this model adjusts the HOC. There are a few different adjusting systems out there and some take a  little getting use to them .
We measure from the ends to get the HOC that the Superintendent is asking for . Go to one side than the other , back and forth a few times till they are equal . I have found quit a few times that the rollers get or are out of round . In this case I would roll the roller while watching the gauge and find the mid point to start from . One more tip is when adjusting go past your mark and turn adjuster down to it . I find doing it this way it will not get knocked out of whack as easily . You may be asked to get the tri-plex to cut at the same HOC as the walk mowers . Because of weight and wheel marks / roller styles they will cut at different heights . You can make a pass in one direction with the tri-plex and mow 90 degrees to it with the walker and make adjustments till they look similar were they cross each other .  We have 3 greens mowing machines model or styles. To get them to cut the same at this course I set them like this . Jac PGM smooth roller .140 HOC
                                       Jac Greens King IV narrow groove front roller .165 HOC.                                     Toro 3150 Q with narrow groove .140 HOC 

If these where all bench set the would read .110 on the prism gauge ( tool for seeing the actual cut ). That's .030 of a difference . That's because the weight of the reel has a downward effect on the turf being cut .The settings are my course settings / may or may not be the same on a different green somewhere else .

Tuesday, December 6, 2011

Aerovator in action


The only way we can aerate fairways here . The PTO shaft vibrates the tines as the forward motion pushes then through the turf .

 Had to replace a few missing bolts . They tend to vibrate out.
One tool... 2 shops . I made this tool by cutting an old socket and welded in an extension so it can go over the tine .  The tines will loosen of , so they should be checked daily . I put them on at 250 ft lbs . and only a few loosen off now .

All ready to go . This is one of the late Fall jobs after the course closes .
 

On our course this is the best way to aerate our fairways . That's John from the crew working the machine . Good guy and easy on the equipment .

Toro 3150 Q reel reasembly after grinding

 Slide the bedbar back in place . The nylon washers go against the aluminum frame then the metal ones go next . Back of the jam nut a little on the pin that holds the bedbar in place .
 Tighten till it's very snug the nyloc nut should be tighten up enough so the the washer can just barely move . I like to reassemble everything back with a little never seize .
 I hold the bedknife up against the reel and see how it turned out after grinding . This ones is dead on . If you double / triple check your set up on the grinder it should be very close ,you may have to backlap in a little to mate in the 2 different grinds . I grind a lot of relief in the reel that way I can get away with just a spin grind here and there during the season  keeping the contact to the minimum .
 Adjust it in till it just touches the bedbar levers . tighten up the spring loaded nut till it's fully ompressed then back of 1/4 of a turn .
i
I spin the reel backwards when first adjusting to get some of the burrs off . On the first try cutting a piece of newsprint it cut on the right and pinched the paper on the left. I backed the left off 2 clicks and tighten the other side 1 click and it came in close enough to cut all the way across . It should have very light contact at this point if not back each side of equally until it does .
 Use a thread sealer or never seize when putting steel bolts onto aluminum . Unless they are stainless steel . The 2 metals will fuse together in time .
3150 reel fully assembled .

Here is how it sounded on the grinder

Saturday, December 3, 2011

Reference lists


I have found that a fair amount of my valuable time was spent looking in manuals for numbers or spec's . Last spring I made a couple of charts to put up on the supply cabinet and desk for the filters used on equipment . I made another list for tire pressures and wheel torques and put them on the wall where the air lines are . Some of the guys noticed the list and top up the tires themselves . I also have a list of fuel tank size to stabilizer amounts listed for each machine . I'll be using that list shortly .

Friday, December 2, 2011

Toro 5410 hydro oil change

 One of my 5410's is do for a hydro oil and filter change . 1035 hrs . it was changed out at break in and is recommended to be changed in 800 hrs .or every 2 years . First thing to do before working on the hydro system is shut the machine off and move the traction pedal back and forth and steering to relief any pressure in the system .  I take the fitting ( hose line ) coming of the hydro tank to drain the hydro oil .  Wear some nitril gloves it can get pretty messy and slippery .
 Most of the oil will drain out ( roughly < 11 us . gallons )
 2 filters to change . One is directly left from to sitting position behind the frame , the other is the obvious long one you see in front .

The front long filter I found easiest to use a large pipe wrench . Tighten down new one to spec on filter .


 Remove both filters .

Check and clean filter sealing surface . Sometimes the old seal may get stuck to the filter housing . In this case they are upright filters, so I fill them up with hydro ( iso 46 ) fluid before installing . Fill the hydro tank and let machine idle till it's warmed up a good 15 minutes . Then you can raise and lower reels , move it forward and back and work the steering to the stops .