A bit of a challenge to build on Roll Over Protection (ROP) On our 7500 fairway units and 8800 rough units. I had put on screening for a quick fix last season. To be able to service the engine it will have to swing it up out of the way to get access . Also most staff around 6' will put the seat fully back .So attaching between the ROP wouldn't work .
Don't weld or drill into the ROP . Using these U bolts works well to attach the new screen .
Measured and cut 1" angle and lined it with 1/2" screen .
Then measured across top mounts and drill out holes for top piece of angle iron . Picked up hinges at a hardware store to weld on so it can swing. Getting access to radiator cleaning is very important . Their blown out after every mow to prevent over heating .
Lawsons primer
and paint are great products .
Hardware for bottom section all painted and ready for assembly .
Using tri pods for paint stands to speed things up . 5 to make and 2 more for the triplexes .
A little video of the finish screen . The bottom brackets will swing in towards seat if needed . Now the guys won't have to look back while mowing speeding things up a bit .
Started the triplexes today . With the forward sweeping ROP some changes had to be made to make the screen work and still protect the operators head .
The hardware store is under renovation so I made clamps . Worked out really well .
Using a piece angle across the top and a level to get the brackets on in the right spot .
welding up the screen frames .
Clamping brackets on for welding .
Only will take a minute to take them off to weld .
Had to add extra for head protection . Cuts in to clear inside of ROP when tipped forward for service .
Cut out and weld on screen .
On the paint rack primed and waiting for paint .
All painted and ready to assemble . I'm using 3/8 short shank bolts to make screen swing up
Same lower mount bracket as the bigger units . Bottom bars can fold out of the way for service if needed .
A few more pictures . Paint matched pretty good after it dried .
Small video of the 2500 E. Nice little mowers .
The sprayer was an easy one because of ROPs position .
wrapped and tac welded a piece of 3/8 rod on screen and zip tied on .
Had a set of LED lights left for extra lighting to the rear of machine . Turned out great
Not only have we built a New golf course we are always finding new ways to add too and build up the community . This week we are getting a rink set up in the tennis court area and will be grooming walking trails as needed after snow falls .
After much research I offered to build a packer ..smoother type trail groom for the course .
Trying to use what was available in the yard for a drum.
18" culvert pipe should work . The idea for the drum is to compact the snow for a base to walk or ski on . Using cinder blocks for weights and some trial and error it should work great .
Cut it to 72" + - .
Ordered some metal for the build . Mostly 1.5 x 1/8th tube stock and some 1" solid bar .
Cutting and measuring total width of inside pipe ... just shy of 18" Length was the same as drum .
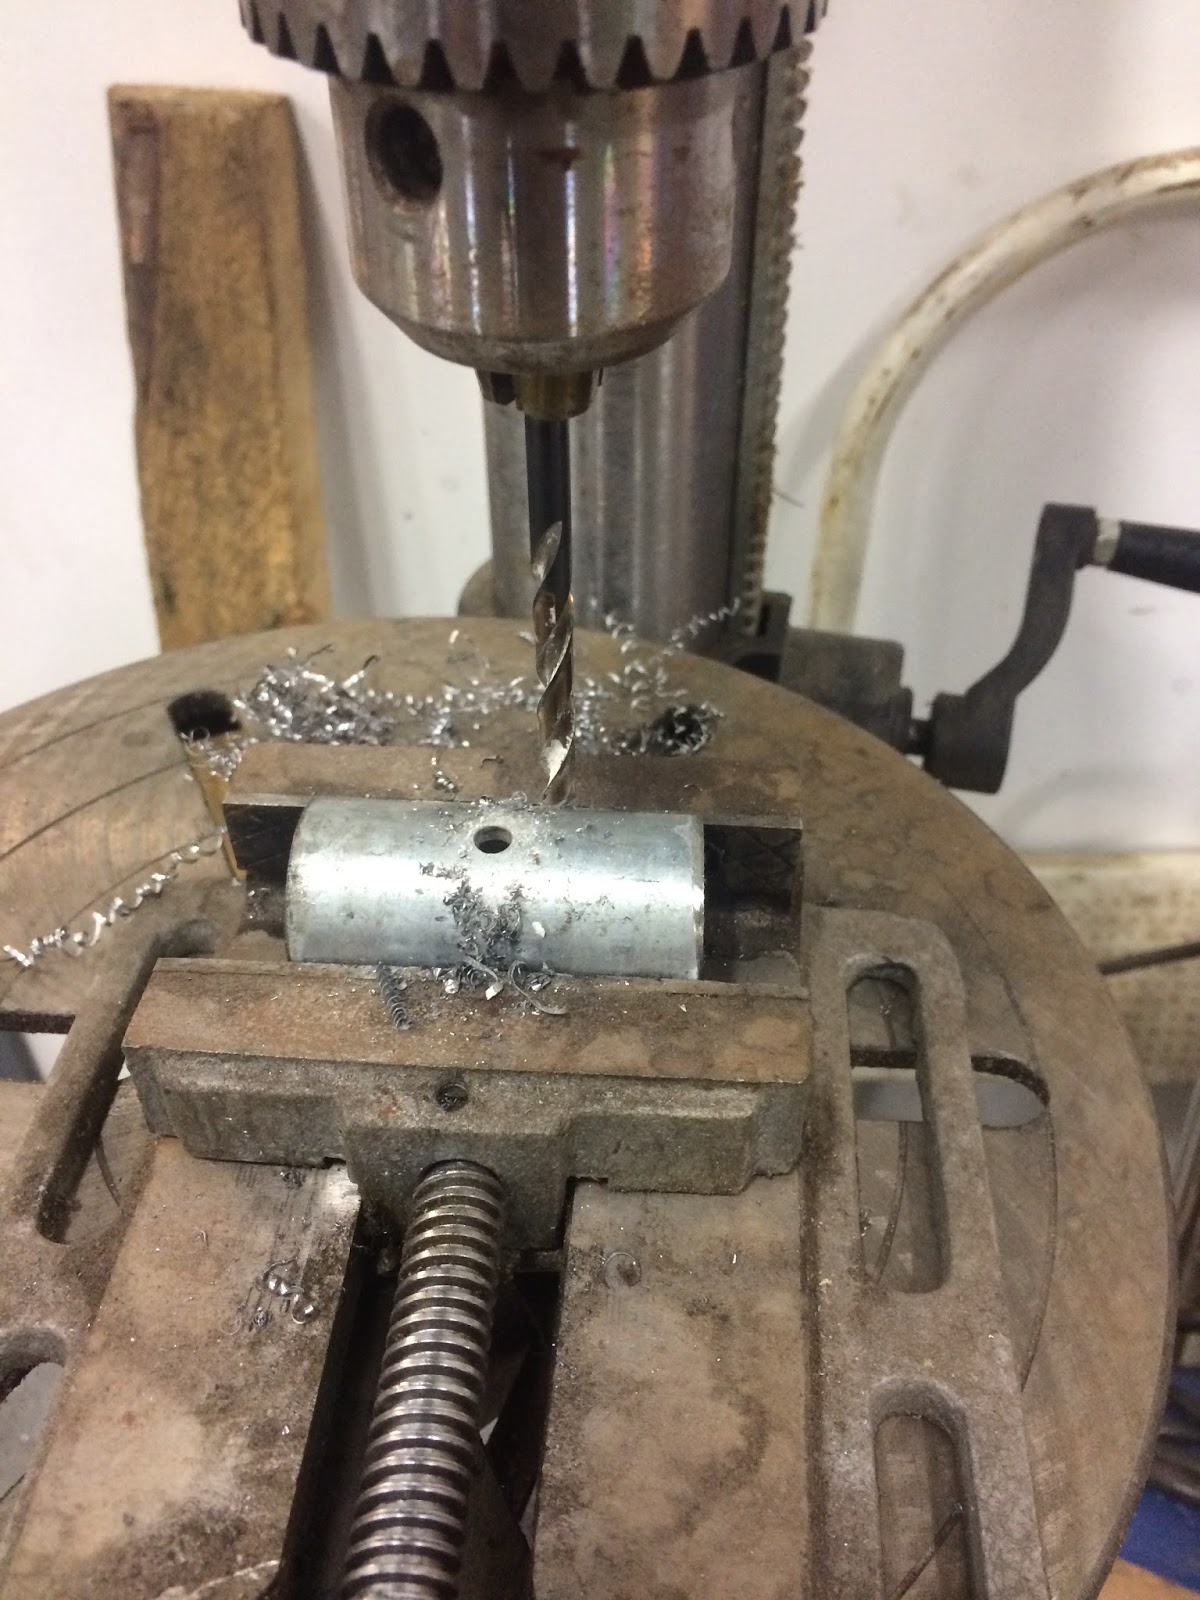
When drilling many holes invest in a good product . This carbine tip hole saw from Lawson works great . Drilling out for 1" solid bar stock .
Drilling a hole right through midway of short pieces for drum .
The hole was very close but had to round file out the rest on just one side .
Just tight enough to press in . 6"length .5" solid rod stock.
Through the first hole
and butts up against second .
Checking for square before
Welding them good and solid
Also weld around base of pipe here
Welded up all the insert pipes together .
Slide it into culvert pipe . This pipe had some markings to show 180 degrees . I lined it up
Drilled the holes 2 in each end 8 in total through bar stock .
Bolted down in place . You can see the marks I was talking about earlier... here .
Next I cut 2 roughly 1 ' long pieces and traced out for round tube stock found in the scrap pile .
Using a hand grinder ,groove them out to the line (just one end). Cut the round tube stock enough to get the bar away from side of drum .
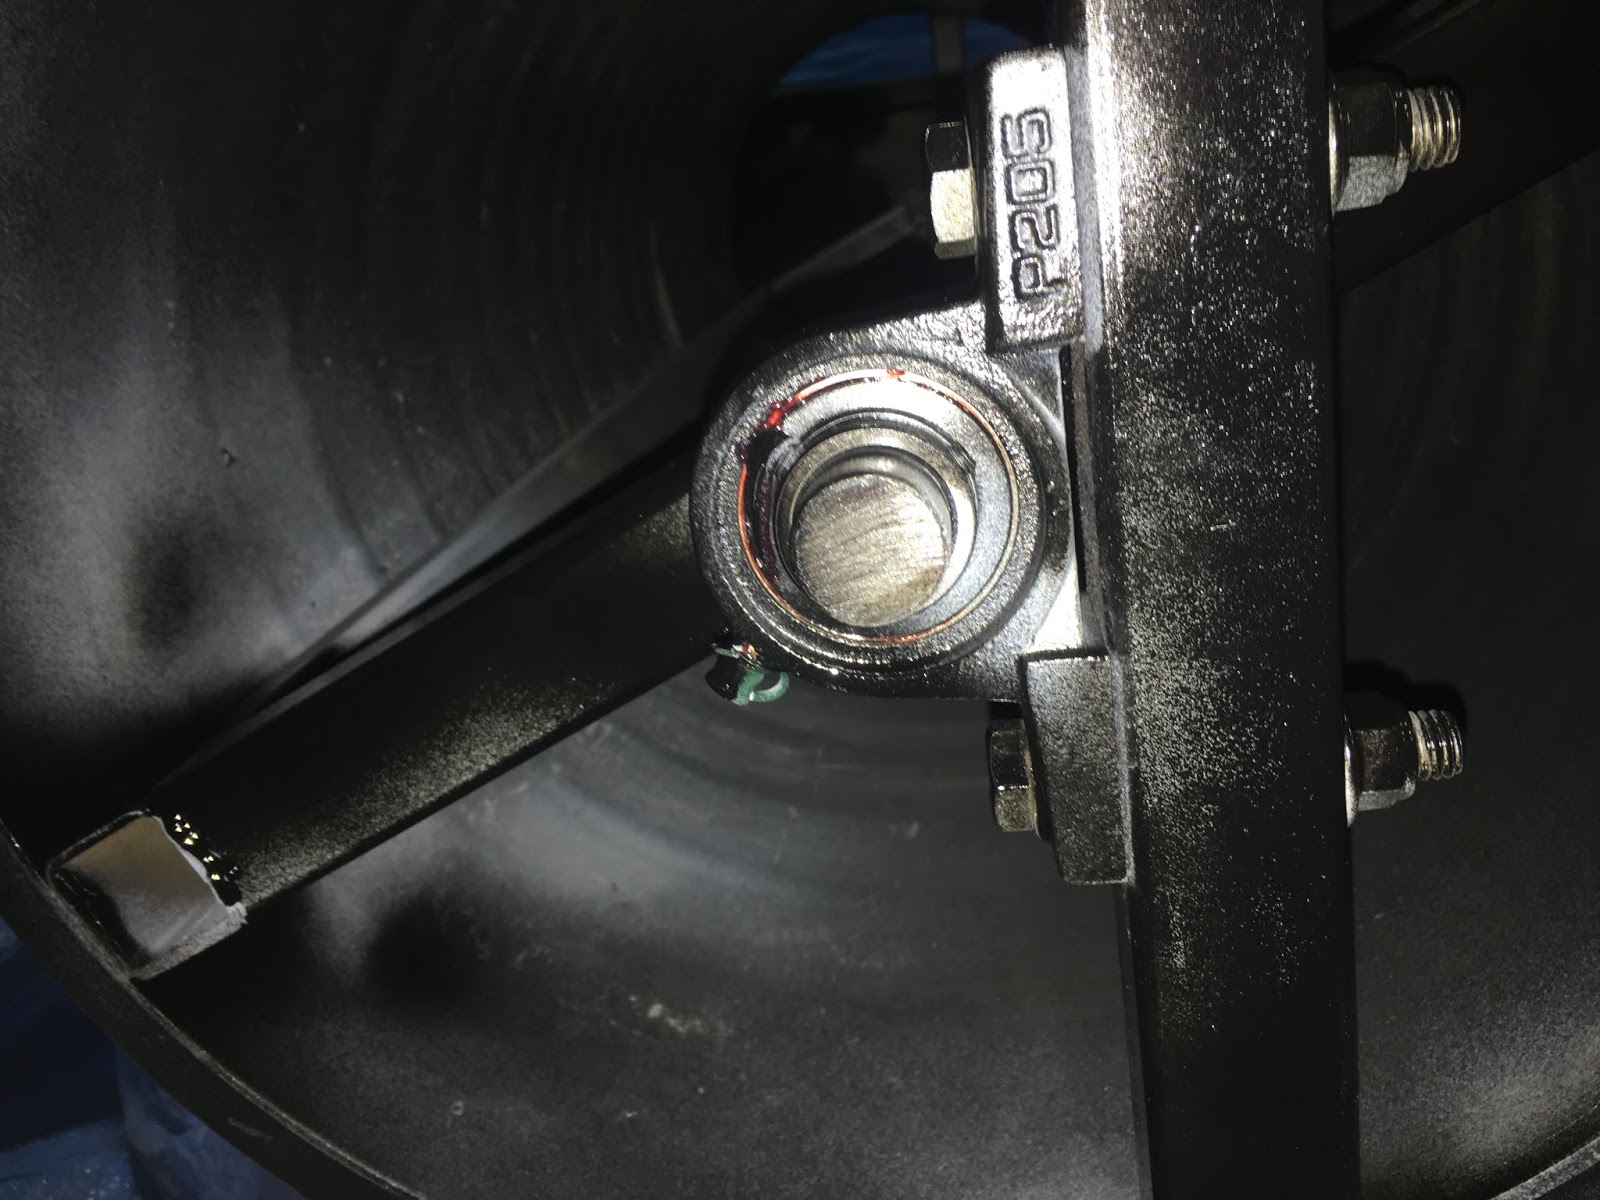
Made for good bushing stock . Drilled a hole 7/32
Tap for a 1/4 - 28 thread count
And install grease nipples.
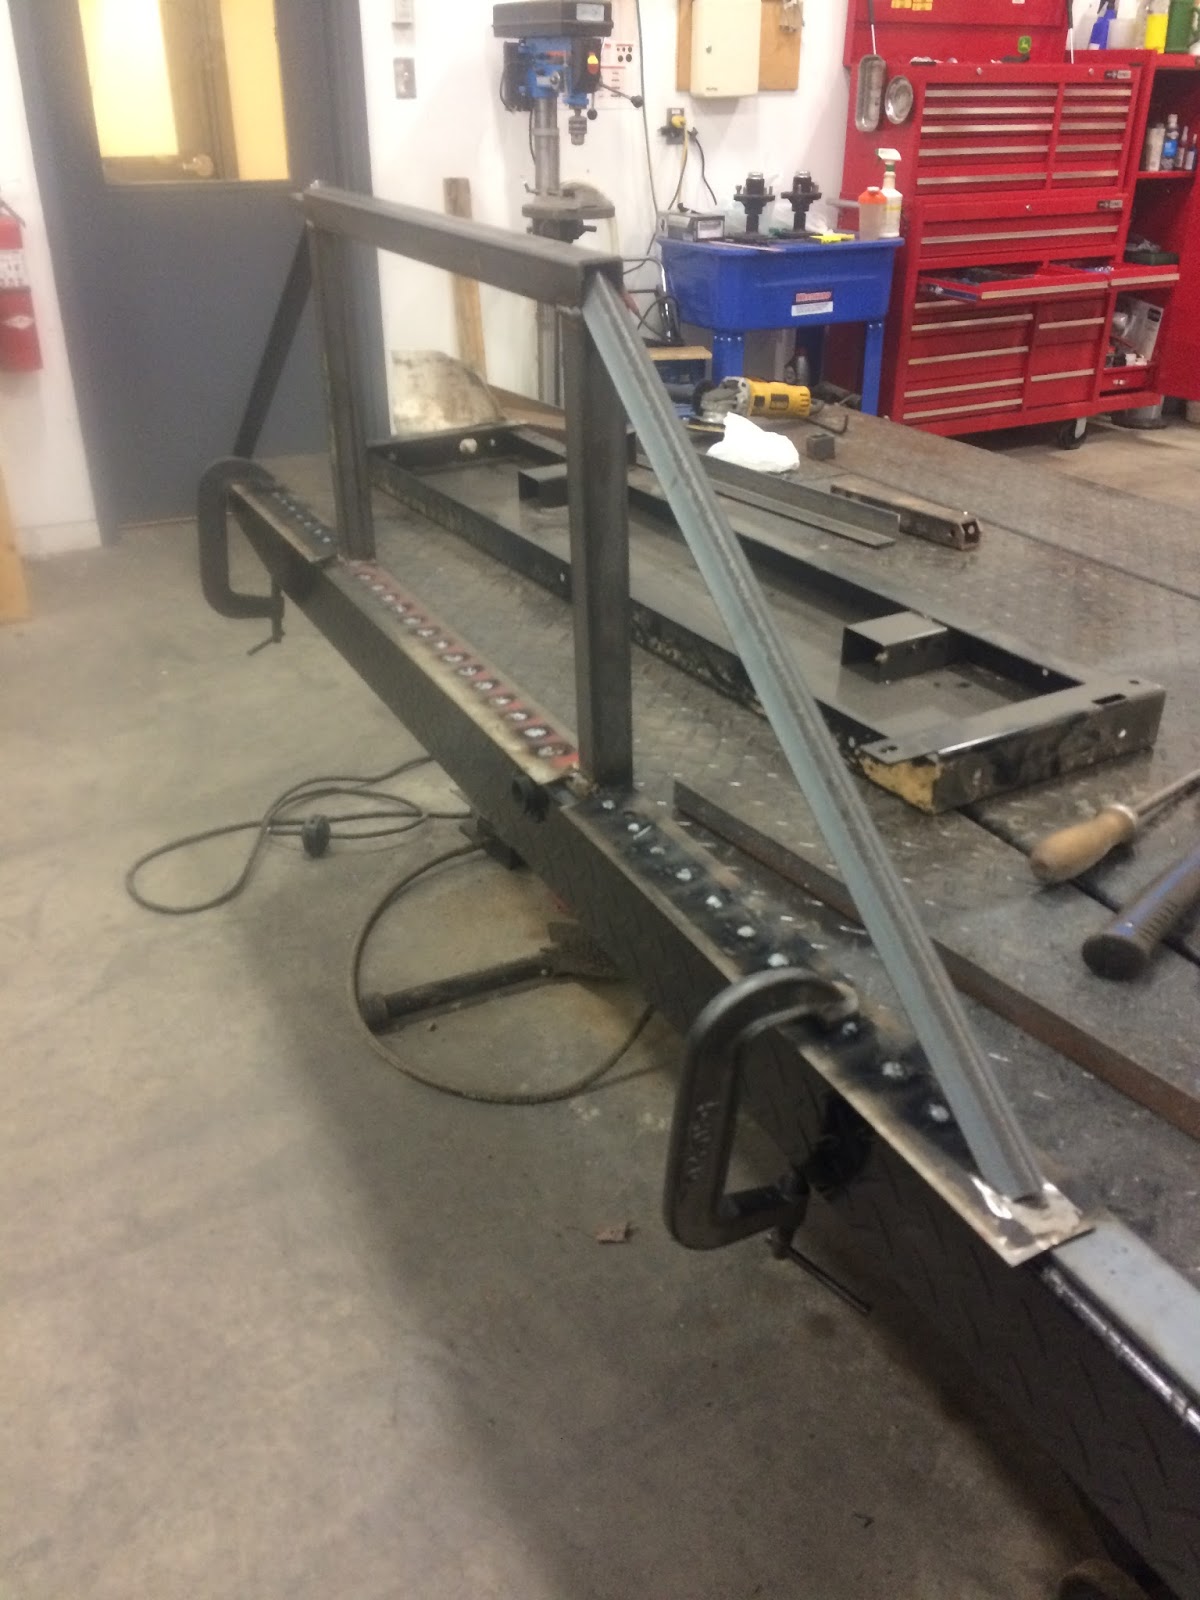
Line it up for square and jack stands are a great help .Tac and weld together.
Lining up the pull arm in centre to weld .
Rolls around great .
Reinforcing pull arm on both sides.
Similar idea for smoothing plate . Leaving a little extra out on ends . This way if you did not need the smoother and needed additional weight for packing you could flip it back onto itself on the pull frame .
Doing this will give an attaching point to adjust different angles .( As you build and design... things may change as you will see later. All part of the process for a first time build ).
Right now I'm figuring out the adjustable section . Using pins I could quick change to a scrapper (If needed) instead of the smoother .
Looking in my scrap pile I'm recycling some bedknives to reuse as a scraper . Laying it out in the scissor lift. Weld inside the holes to a piece of 1/4" flat stock.
On the smoothing section using bedknives again . The hole spacing is perfect to put bolts through .
Weld it to a piece of 1.5 " tube square stock . ( after the trial run I'm going to put a deflector of some sort so the snow doesn't pile up against square tube) .
Welding was quick and easy on the back side .
Scraper blade was a little to flexible ,adding bracing like this stiffen it up good .
Laying out scraper and smoothing bar .
Happy with this set up and tac and weld in place . The scraper have 1.5" angle on both side of up rights to pin it in place .When its not needed we can just remove it .
All assembled . It's in the up position adding more weight on drum for compaction . It will need more weight for it to work properly . I'll build a weight box on the Y section of pull frame on Monday.
When the trail gets compacted you flip the smoother down to help
keep a level surface .
You can see the pin set up for scraper in this picture . Welding in supports
for a snow deflector from cutter made from rubber mat . Using self tappers and washer it went on pretty quick.
Ready for paint and a few minor mods after the trial run .
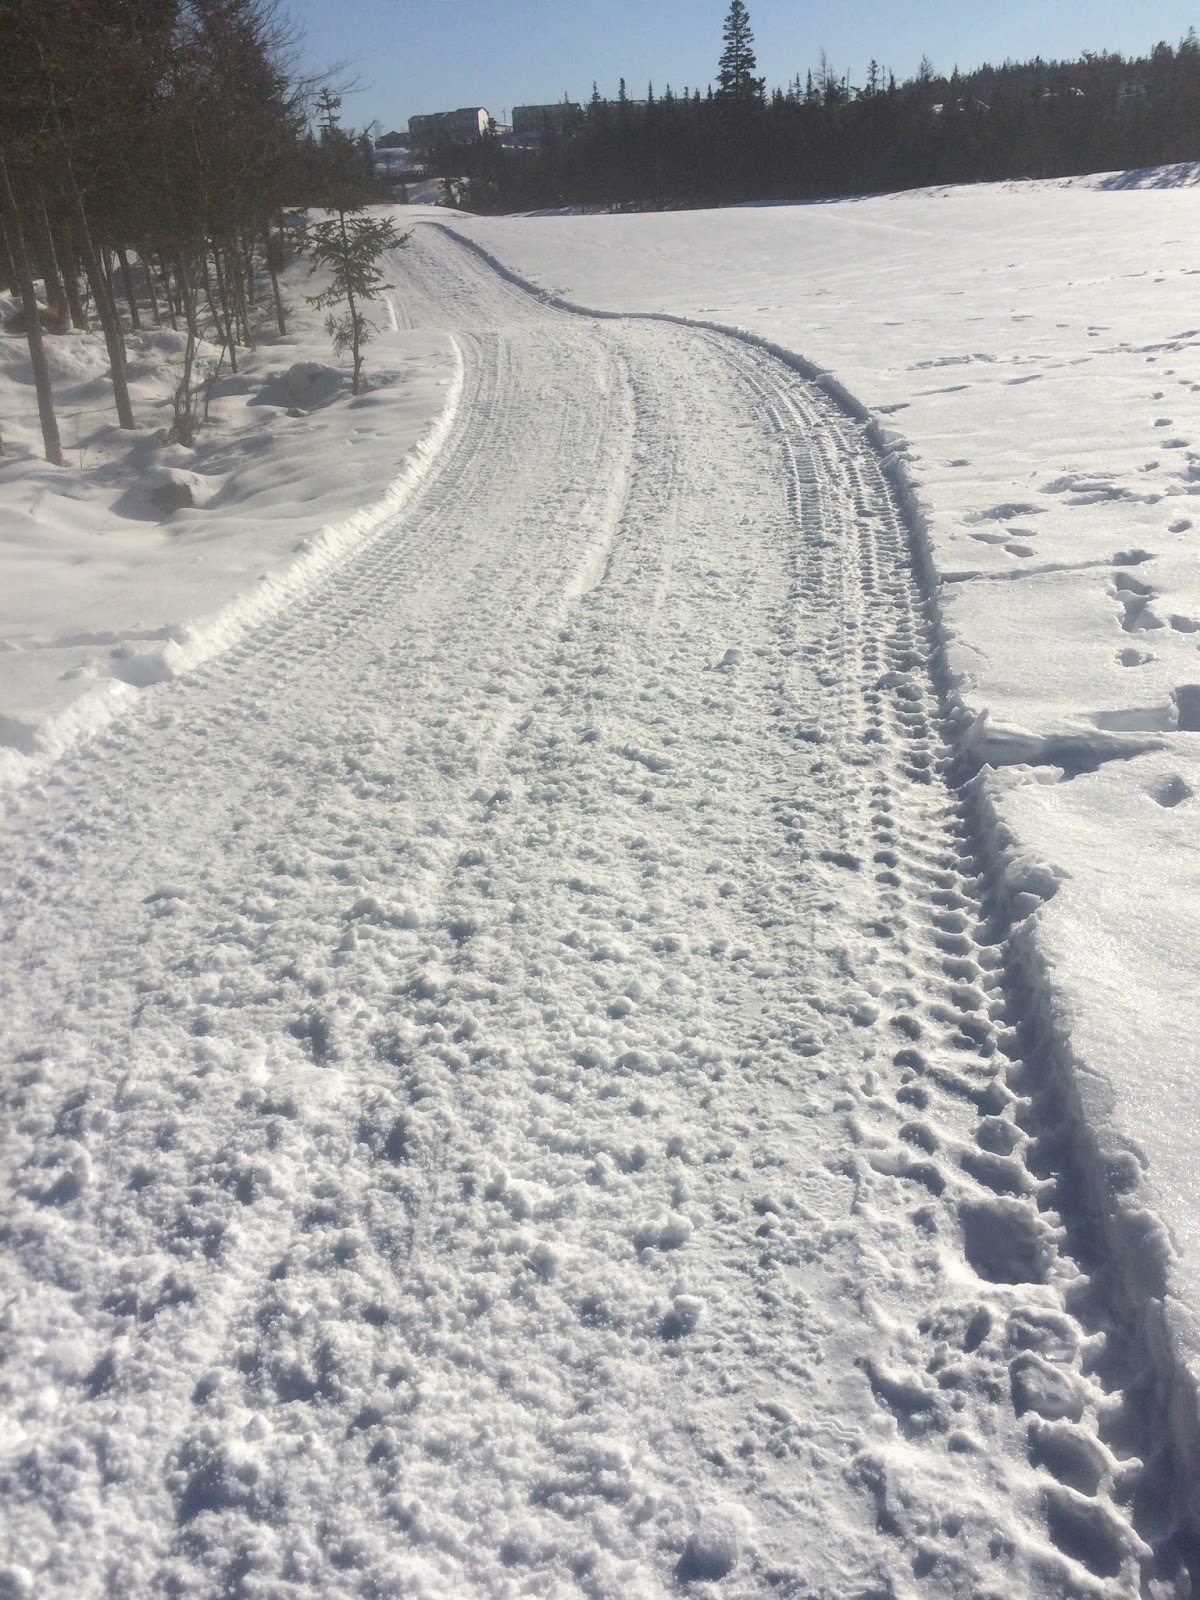
Snow was getting scares dry and crusty but I did try it out where the loader had travelled the previous day . Not bad . Just needs more weight ..the right type of snow ..and a little deflector on the smoother bar .
2 days and about $200 .
Finally some snow to groom . Had the groomer out today and it work great '