Wednesday, February 26, 2014

Club Car charger damage

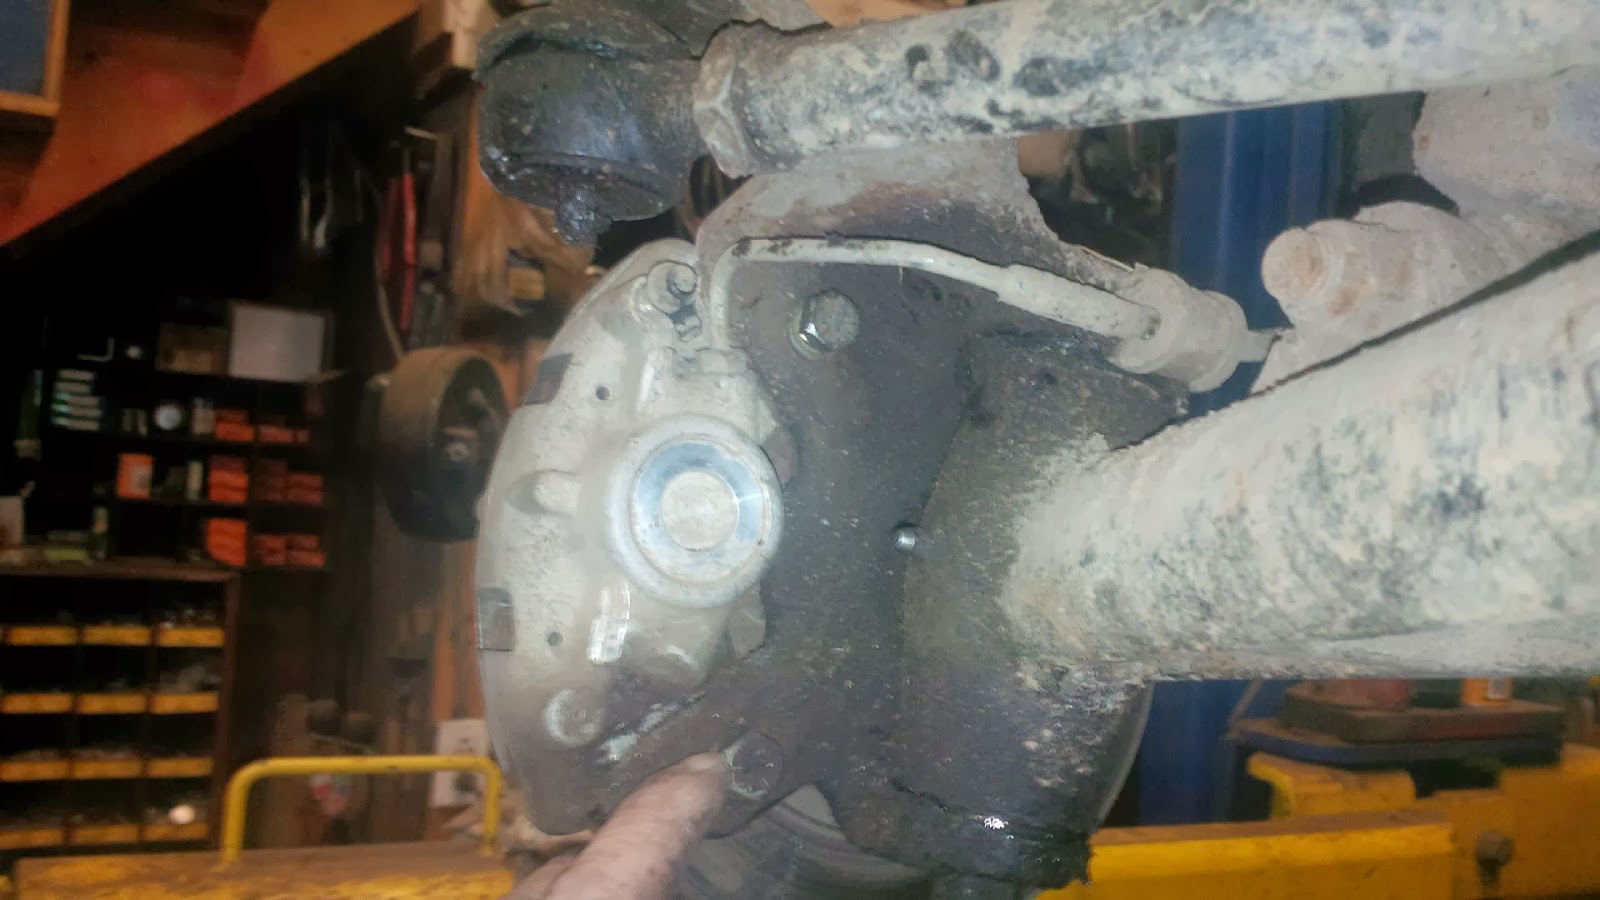
Not  uncommon to see this type of damage . This ones been run in to pretty good by the looks of it . We kept a couple of the old rental carts and I didn't get around to hanging up the charge like the rest of them . 

Looks bad ....funny thing is that it still works .


Pretty sure you can buy all the pieces for repair but we just straighten them back out the best we can . Most of the time we get 2 or 3 a year were the cart staff forget to unplug them and drive off . To bad there isn't a built in way that they will not move unless unplugged . 


Taking pictures of all the wiring connections before you take it apart can speed things up on assembly .

   
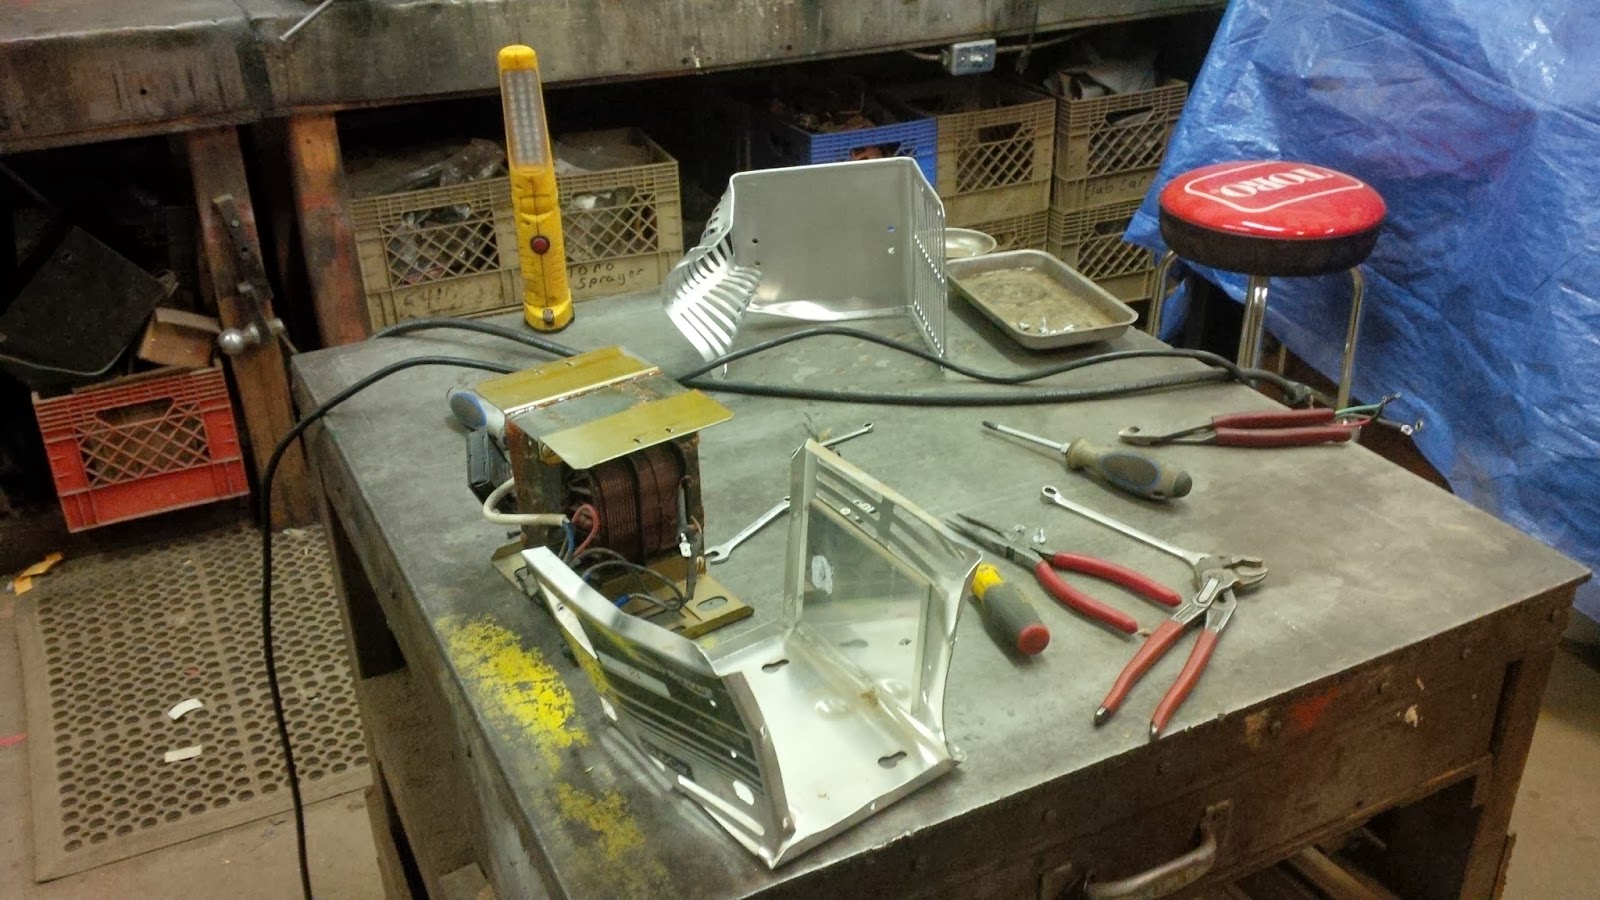
Not to hard to take apart . Now you can straighten out the parts the best you can . The aluminium was stretch a bit in one area from the impact .  


Usually you can get them to look pretty good .


Looks like a charger again . 


Now the internal parts won't be up against the casing causing a short or shock hazard. 

The old sprayers in an should have a little down time waiting for parts so I may have a chance to build a shelf or hanger for this charger . After that I'll have to figure out a good idea for a wheel stop so that the electrical panel back board and exterior walls don't get run into again . The cold storage shop floors are polished cement and sometimes the carts slide to a stop .


 When you get reoccurring problems keep them in mind or right them down so you can find a solution for them later on .

Working on repairs and solution.


Removed the bracing I had put on last years damage . Had some left over plywood from doing a seat base repair on a Club Car.


Shelves built .I was thinking of attaching it to the shelve but feared it would haul the panel of the wall  if they forget to detach the charge cord .


Now for a permanent solution . Went to my scrap metal pile for material . Found lots of heavy gauge U channel stock to use .


Cut and welded pieces together . kept up right post about 33" apart to match wheel width and kept it around 10" high .


Found some 1/4 plate for bases and drilling out for 1/2" anchor bolts , 4 in each plate . taped of the black in strips to make hazard lines . A few more coats and touch ups and it will be ready for install in front of panel . 


 http://golfcoursemechanics.blogspot.ca/2011/10/electric-club-car-president-trick.html


This trick somebody posted once helped a lot .


Tuesday, February 25, 2014

Toro MDX fuel Filter placement

Just finishing off the rest of the 800 hr. service on the MDX . 


After replacing the fuel filter I'm looking at it resting on the spark plug boot . When you work in this business long enough and see what can happen you get an uneasy feeling about this one . First .... if the spark plug boot gets torn and starts arcing (hard to get the boot off unless you reach up from the underside , it's a pretty tight fit ) it may not be a good thing especially if the clamp doesn't seal and fuel starts dripping with the exhaust pipe near by too . 
I'm sure it's fine but I'm going to extend the hose going to the fuel pump and split loom it . 


Twice as long + as before . 


That way the filter can sit back further in the frame .


The new line was zip tied to keep it from moving .


Should be good now but I may even relocate the fuel pump later on .

_____________________________________________________________ 

Also changed the plugs . I noticed a fair amount of soot on them which tells me it's getting to much fuel . 
You should check choke cables . If you don't they will drive them with the choke partially on . 


First thing I checked was the choke cable to see if it is binding or sticking . It was fine . 


The choke return spring is weak and I couldn't get another turn on it for more tension . So for now I gave it a little helper spring .


Good as new . 

_______________________________________________________________-

Winter work is almost done just sprayers left and maybe rebuild our tow behind top dresser if time and budget allows . At least make up a parts and price list . 
As the guys come back I'll be checking tractors and trailers and start servicing small engines ................then it will be go time again for another season .


Monday, February 24, 2014

Toro MDX front disc brake change

Our first MDX just turned over 800 hrs. and I'm going over the 800 service interval .


Not to hard to check them . You can see how much pad is left by looking through the openings in the caliper .

  
If you have the anti chatter clip you can pull it out and look also . 


Caught ours just in time .


Anything less than 1/32 " of an inch of pad material needs replacing . 


First remove the cap on the brake reservoir .


The 2 wire clips just pull out . There are 2 bolts on backside that removes the caliper . The brake line can be pulled through the rubber grommet a little to make it easier to work on . 


I've seen the same type of brakes on small cars . 


The pads come as a kit to do one wheel . In the package includes new wire clips and instructions . The instructions mention to use a screw driver to pry on the old brake pad ( while its on the disc before removal) to push the piston back . 


There is no through opening to use a clamp the normal way . I had to improvise a bit and used one of the wheel nuts to push on the center of the piston so it doesn't bind sideways  . 


Watch the piston and feel how it goes back in . It should be easily pushed back not jumpy or excessive  force with the clamp . Push it till it just bottoms out . 


Pads only go one way with friction material facing the disc . The slots sit on the wire pins .


Assemble disc pads and pins in caliper . also de-glaze the disc and check to see if it's warped or excessive wear . The pads ALWAYS wears more on the piston side since it 's the pad that makes contact first . 


You can slide the anti chatter clip in if yours has it . 


You can now install the bolts and torque them to 35 - 40 ft. lbs. 


While your here you can clean up the bleeder screws threads and put some ant seize on them . 


That way if the brakes had to bled later on you might have a better chance to get them to break free with out snapping one off. 


 Picture above of De-glazed disc with some medium grit sand paper . Before you test drive ....push the brake pedal down a few times first to get the new pads out to the disc . 
   I'm a bit of a pack rat so I'll keep the 2 outside old pads and a couple of wire clips ( for just in case ) . Most likely will never use them but you never know in this business . I've seen parts missing that leaves you scratching your head at times . 


Friday, February 21, 2014

Club Car Electric President golf cart Mid winter battery maintenance


Now is a good time to go check your rental fleet batteries for water level /corrode wires on terminals and also snug the connections down . We keep ours plugged in ( as per manual ) all winter and are in a cold storage shed kept at about 10 degrees C .I find by mid winter the water needs to be topped up . Winter tends to suck the moisture out of everything . Our fleet of 30 rental carts will usually take anywhere from 30 to 50 liters of water . 

The new fleet  that we received last season came with the single point battery fill option . I think they come standard with this option now . 


All the batteries are hooked together with fill check valves to maintain them at the right level .


We are using the deionizer that filtered the water from the old fleet . 


The fill hose just has a button to push down to attach it to the battery fill tube .


Hard to tell but the red section is actually 2 red balls that spin while it is filling . If your old enough you will remember sitting in the back seat of your Dads car watching the ones on the gas pumps spin . Same idea. 


As soon as they stop moving just disconnect . So easy anyone can fill these battery and much safer . Less chance of acid getting splashed in your eyes and clothing or having overfilled/under filled batteries .. Very cool system . The valve depending on water pressure will pump 18 gallons a minute . Our batteries took on average 10 seconds to top up each set  .
I also had time to grease the front ends and checked tire pressure . Also lubed the plug section with WD 40 .
 Impressive set up .

Monday, February 17, 2014

John Deere 4x2 rear tire bead sealing trick


I thought I'd post this.
When I first started in this side of the business I had a few things to learn . When changing tires on theses rims there is a little trick to get the tire to seat on the bead . A long time ago I use to spend a fair amount of time trying to get these on . We tried sealing the air gap with greasy tubes etc . Getting a couple of guys to hold it up enough for the air to grab and after many tries and frustration + loosing 5 lbs each it would go on the rim . Not sure how I found this out but assume it was on one of the tech sites . 

After getting the tire on the rim your looking at this impossible gap to get the air to push the tire onto the bead . Valve stem up . 


The trick to getting them on is flip the rim and tire to the other
side on the tire changer. and fill the tire up with the valve stem on the under side . These rims have a huge shoulder and the tire will grip that side when it's flipped . Then you just push the tire down and put the air in . Easy .


This is what the gap looks like now on the underside ...valve stem down .  


These two took less time to mount than drinking a cup of coffee . I get a chuckle every time I put these on . Old memories . Lol
PS: I just have a 99$ tire changer . pretty much will do anything here .