Friday, April 27, 2012

Rotary blade Sharpening


 These are a few picks of our Toro 4300D Groundsmaster mower ( Rough mower). Out of all the machinery these mowers get the most abuse on blades . There is is a reason they call it the rough and the blades will show you how rough it really is on your course . A good operator will get use to mowing these areas and know where not to mow to cause the least amount of damage .
 These are picks of blades with about 6 hrs. on them .
Rotary blades are at least easier to get sharp than reel mowers . The blade above is referred as a gator style blade. The notched area ( sail ) helps break up clumps from mowing in wetter conditions . There are many ways to sharpen blades . Some course (very few ) have machining equipment and can mill a new edge .You can buy a grinder specific to grinding rotary blades but are pretty expensive . For myself I use a 4.5 "  hand grinder with a medium grit grinding wheel . Pay close attention to the factory edge/bevel and follow it . When the course gets into full mow mod I may not have time to grind blades so I keep a spare set for each machine . With my equipment lift I am able to switch out blades daily if needed . If time allows I'll grind them if not I will set them aside for later .
 This is a little blade balancer . I use it to make sure the blade is somewhat balanced . If it drops rather quickly when placed on then grind it a little bit more till it balances itself out . You don't have to get to finicky with balancing, the centrifugal force of the blade spinning will find a balance on it's own .

 I will remove blades with an air gun but I won't install them with one . I'm using a block of wood to block the rotation and TORQUING the bolt to manufacturers specifications . You could drive them on with an air gun but may risk over tightening the bolt or worse yet ruin the spindle bearings . One the guys on a tech site made a tool to hold the blade but I just haven't found the time to make it yet .


Most importantly don't straighten a bent blade , check for cracks around the mounting area and sail . Once a year replace the bolts holding the blades on .
The blade closest to you has seen it's last grind .Two types of blades here . Top gator style (brand new ) and bottom is called a combination blade . Notice the the sails are different on it . Must be to lift the grass better . The bottom one is great for dry mowing . There are many different blades avaliable for different mowing conditions . These ones work the best for this course .
 
A couple of pics of our rough cut .

Verticutter (-) set up for Toro .

I'm setting up the Toro Verticutting reels for our Toro 3150 Q triplex greens mower . The Superintendent wants them set at 1/16th depth . We are going with a light verticut to start things of. The minus in brackets means the verticuters are set to go into the turf . A positive setting would make it act more like a groomer .

 First thing to do is clean them of. Next check for play in the shaft bearings and adjust . Straighten out any bent blades ( a pair of needle nose pliers works well ) and remove any objects like pebbles and sticks stuck between the blades .
 Check these collars on the rear and adjust them so the wheel can turn fairly freely .
 Adjust the scrapers on rear wheels
 and front roller to almost touching . Grease bearings rollers etc. and give everything a spin and wipe off access grease . Seeing grease blobs on greens is frowned upon .
 I'm using my bench plate to adjust it or find a flat level surface to work on . These cutters came with adjustment shims of different sizes . I have used washers or flat stock in the past  . Just use a micrometer to get 4 of  =  thickness for the depth your looking for . Maximum depth is 1/4 inch . There are other machines out there specifically made to go deeper . Gradens are one of them .  
 Putting a little weight on the rear bar . Make sure the shim stock is sitting under the rear wheels and front roller . Now I back the front rollers up till they are not touching the front shims .
 The verticutters are sitting on the bench plate . Next I adjust the rear roller so the shims feel like they have equal drag to them when you move them in and out .
 The adjustments are made here . Now the cutter is squared up with the rear wheels . It's time to move to the front rollers . Leave the weight on the rear till your done .
Place a piece of paper on top of the shim stock . Adjust roller on both side till you feel a little drag on the paper when pulling it towards you . Loosen the pinch nut on the sides before you adjust . When your done tighten the pinch nuts and your done . When all the shims are removed the blades will be cutting 1/16 into the turf .
 I label most machines and cutting units so the superintendent or any staff knows at a glance what the machine is set up for .

If you where to set it up on the positive side you would place the shims under the verticutter and adjust wheels and roller down to your level surface . It would then act more like a groomer . Would be good for higher HOC.
If for some reason there is no adjustment on the front roller , readjust the rear rollers lower an then go back to the front .

Tuesday, April 24, 2012

Toro 4300D front deck repair (revisited)

 A few picks after the maiden voyage .Brand New operator and it came back pretty good .
 My front deck repair did a great job at deflecting the decks up and over .

Instead of denting the deck in . Blades had a few nicks , but over all an improvement for sure .


Wednesday, April 18, 2012

Opening Day April 17th

Had a great opening day . Course looks very good for being open early . The course is quickly coming back to life .We sure could use a little rain . We managed to mow the fairways / rough and double rolled greens .The hauling and raising of the safety nets to protect the homes in the areas had to be biggest job of the day .
      It was a great day for golf for the Ashburn members . This season we open the Old Course first creating a welcoming turn out . Irrigation was fired back up at the end of last week with minimal problems do to the unusually mild winter .There are still a few projects to tidy up and will be getting back into the summer routine before you know it  . I managed to train a few new staff on some of the larger equipment . The new staff are looking pretty good so far .
     I'm starting to get back into my routine and helping out when needed .I will be helping out with some mowing jobs till the students get back . As a tech you may be asked to jump in and help out when your club is short staffed at the start of the season .  I have a few projects to tidy up myself . Currently have the ryan greensair 24 in the shop for service and adjustments . I'll be keeping the dimple tines on it while the grass is filling in . We use it quit often to dimple and seed thinned out areas . It's not going to get a good work out this year . The new machines that we received recently have a chart set aside for up coming warranty oil / fluid changes . Very important to do the initial changes do to the fact that you can get a fair amount of small particles in the filters during break in . I like to cut open the first filters changed to check the size of particles and see if there are any unusual particles like rubber or brass . Don't forget just because it's new gear doesn't mean it doesn't need any extra attention . The first 8 to 50 hrs. are important , keep and eye out for unusual noises / loose bolts / hydro lines/ fluid levels  etc .

Monday, April 9, 2012

The Excitement of the new season is starting to build .

We tried one of the new flex 21 today , very impressed . Guys are filling in a few drainage ditches and buttoning up some odd jobs . Soon we will be getting the course ready for the new season . Lots of trap work to do  and nets should be out soon and will be getting the first cut on tee's in the next few days ( weather permitting ) .  Days are noticeably getting longer and seasonal temperatures are looking good for an early start . I'm  still going over a few more small engines .Very soon I'll start hauling out gear and double checking HOC's and tire pressures . Our rental Clubcar fleet are ready to go . The Old PGM greens mowers are going back to tee HOC and will work much better cutting tee's than the previous models . I'll keep one of the pgm mowers set up for greens in case we need one for tournaments or as a back up . ( just in case ) It's good to have some back up equipment for key areas of the course . At least have a few pieces that can be set up incase there is an equipment issue . We have a few more staff on now and waiting for students to finish exams in the next few weeks .Won't be long before we're back into the summer routine . My winter work went well and feel quit confident that the equipment is up to par for the upcoming season . I still have a few more pieces to pick away at between mowing jobs and maintenance till the full staff are back . Once the staff are picked for the bigger equipment I'll start training them on the equipment and mowing techniques . Rumors of a dry summer  . Will have to wait and see . All we can do is  hope for a great spring to get things going . Hope everyone in the golf business has a great season .

New Flex 21 2012

 Behind the gear cover it shows the different set ups for clip rate .
 The three gears can easily be changed around on shafts to get the desired clip rate on chart for HOC and for how many blades the reel head has . Took me less than 10 minutes a machine to change things around the first time doing it .
 Three shafts ...Gears removed .
 Using this set up and just experimenting with new machine . This set up will do use till we get down to .135 . If we go lower I'll have to change the gears around again . Pretty easy set up .
 This spring gives you the proper tension on drive belt . You place the belt on and then tighten the pinch nut .
 Closer pick off adjustable handles . They come shipped  all the way down and I have to set it up to the highest position . I lined it up with the top line when I finished .   

The angle of the handle can also be changed to two positions . Just remove one pin and pull out and install in the next holes .  
 The thumb dial for speed control work very well . We liked the fact that we can control the speed and not change the clip rate .

Here is a pic of the park brake handle . Also there is a dump bale handle now . As soon as you let it go the machine stops . Also cannot engage drive or reels without holding in on bale handle . On the right side of drum (in mowing position) there is a flip up lever to disengage the drum so you move it easier if it's broken down .
 .


Last and not least I really like the fact that I can use one wrench ( 16 mm ) to adjust reels etc. No more caring up to 3 wrenches for adjustments . This is a big plus . Thanks Toro .

Friday, April 6, 2012

New Gear 2012

Just received the new gear this morning . We are replacing our greens mower to the new style flex 21 and trailers for them . We also received another 4300 D grounds master rough unit . We are so pleased with the first 4300 that we decided to get a second unit to speed up cutting rough . With the smaller decks they don't scalp the turf .


 I really like the fact that the handles are adjustable for the height of the operator also the rake angle can be adjusted too.
 Behind the gear cover there are 3 gears that can be positioned differently to get the right FOC (frequency of clip) adjustment for the HOC ( height of cut ). I'll get some picks of these gears later . Also has the Subaru engine . There are a few more changes that I'll get into later . Should be interesting working on a different style greens mower . It's going to make grinding a lot easier not having to lift machine up onto grinder . Reel head is easily detachable .


Wednesday, April 4, 2012

Small Engine Maintenance .

 Just starting to go over my small engines . We run Stihl as much as possible here . I have been using castrol 2 cycle oil for most of the time since I've been here ( 7+ year ) Never had an issue with engines bogging down from exhaust ports clogged with carbon . Tanaka and of course Stihl are other 2 cycle oils I have been pleased with . I order filters and some parts that I know I'm going to need . A couple of hundred dollars a season for maintenance saves me a lot of grief during the summer .
 Here are a few picks taking out the fuel filters . a piece of mechanics wire to fish them out .
 When putting the new filter in make sure the line doesn't get kinked or pinched and that the filter sits on the bottom of fuel tank .
 Check the air filter or filters . Some machines have foam pr filters , they can be washed in dish soap and rinsed to reuse . The paper type filters I will use low pressure air and  blow out and if there starting to look old or are oil filled I'll replace them .
 I'm checking all the gear with pull cords and replacing the ones that I don't think will make it through season . This will prevent some of these jobs in the summer when you get busy, allowing more time for adjustments and keeping sharp edges on the mowing equipment .
If there are spark arrestors ,you can clean them with a small wire brush ( toothbrush type )and carb cleaner . If they get plugged bad the machine will idle but as soon as you hit the throttle it will just bog. In extreme cases you may have to remove exhaust and bake the carbon to dust with a torch and clean out the exhaust port on the engine .  
 I don't replace the plugs unless the edge is rounded on the bottom terminal . I'll check the gap and adjust as needed . 

Just a pick of a new plug .See the crisp edges . I'll spend some time cleaning the machines up and repairing any damages usually from old parts  . For lawn mowers I'll sharpen and balance blades . Snippers are all restringed and everything gets fresh fuel . When I put them away for the season I will mix fuel up with stabilizer and run them then dump the remaining fuel out . So far so good I Stihl have a 1995 BR 400 blower and running strong . Some of the smaller gear can get pretty pricy to replace so doing a little preventative maintenance pre and during the season can make them last a long time .
If your running the same gear year after year and sometimes a machine gets retired because of wrong fuel or for other reasons don't throw it out . Dismantle any good parts for later use . It will save you a bundle . Some small engines are cheaper to replace than to repair , I look at the cost of it new machine and at the age of the current machine if it's fairly new I may spend up to or just under half the price depending on what it is . An older model maybe a quarter of the price for a part .  If doing any major repairs price out the parts before tearing into it . It may be better off as a parts machine sometimes .

More information . 2014
FS85R

Pointing out some thinks to look for when disassembling and putting snipper back together .


This is one of our older snippers pre 2003 model .Been here longer than I have . Mount shaft in vice for easier tear down. 


Back out the screw that locks engine to handle then loosen the one below it . On the trigger handle on opposite side of this picture there are 2 recessed screws that can be loosened off to release it from shaft . 


Slide it off and place on bench .


This is whats left in vice .Check bushing .


Remove the 2 screws holding the cover on .Then 2 more to remove the fuel tank . You can tell this ones old the fuel tank has yellowed quite a bit over the years . 


Check pull cord for fraying .


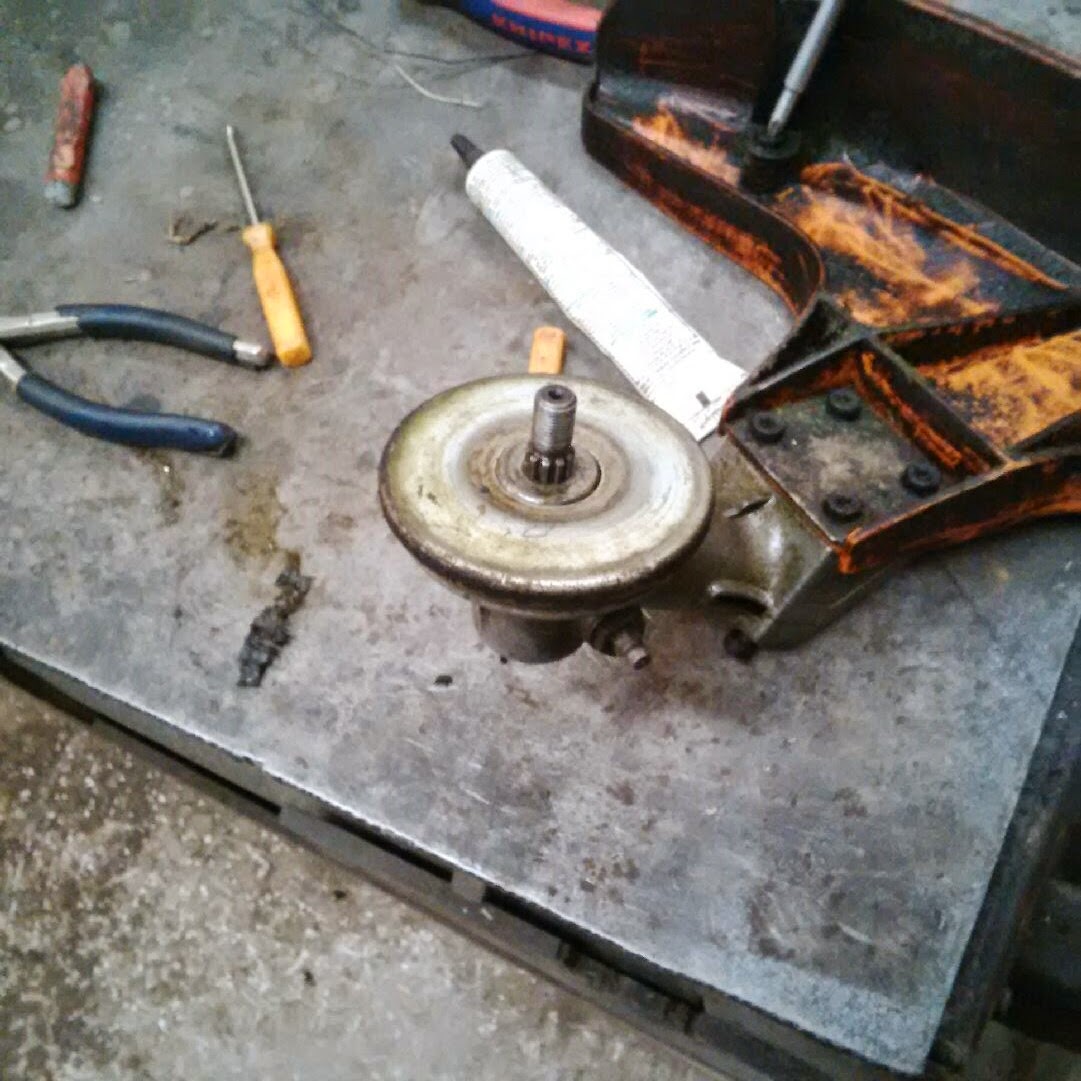
3 more screws removes the clutch housing .


Looking for any missing parts like springs and clips or chipped shoes . If you ever had one that works great but won't idle or runs rough then a spring may have broken on the clutch . I have seen a few of them do it . 


Check this end for worn bearings . Clean both parts with brake clean or parts cleaner and dry off . 


Air gap for coil . I don't usually check this unless the coil was replaced . If your in a pinch a match book cover makes a perfect tool for gaping the coil. loosen coil off rotate clutch ( ground wire for spark plug first )till magnet pinches the match book then snug in screws  


Check plug if it the sharp edges are worn replace plug . Check plug gap before installing .


You can get lube sticks to put on threads of plugs . I used a good contact cleaner for spark plug wire then a die electric grease on plug end . 


Reassemble clutch housing .Check to see that the rubber plugs for fuel tank are stihl in place plus the one on the pull cord housing . Check fuel lines and replace them if they feel hard also replace fuel filter every year . 


Pull the spark arrestor screen out of muffler . If it looks like this just spray some carb cleaner on it and blow off  . Screens will get plugged from old fuel ,wrong mixes , running them at idle for long periods of time . plugged screens usually involves removing the muffler ( three screws ) and torching it with a propane torch to burn out and carbon etc. Blow out afterwards . If the machine bogs from idle to run speed then most likely it's carbon up . 


Check primer bulb for leaks or cracks .screw in center of pick will take some slack out of cable . leave it slightly loose . also on top of handle the there is a slot you can slide to make more adjustments to throttle cable tension .


Line the top screw with hole , you might have to move motor in and out turning it a bit each time till the shaft lines up with clutch.


Slide handle back so wire loom sets in this spot as shown in the picture below.


Installed a new zip tie to let the staff know what fuel it takes . Clean or replace air filters . install motor housing . Fill with fresh fuel and start . Set jets if needed and idle screw so snipper head is not moving . This screw on the older ones will vibrate to full throttle . I put a dab of silicon on it to keep it in place . 


Check the line trimmer . This one was loose . 


Grease the snipper trimmer head .


Different machine . But some one ran raw gas through and scored the piston and cylinder . Even with all the systems in place to prevent this it can stihl happen .


The machine is fairly new and will repair with a new head piston assembly . Waiting for parts .