.
Throwing down the sand and then running equipment through it in my opining doesn't make any sense other than creating more work for techs.
Sure, it is visually more appealing.
The aerating equipment and tines get extra wear.
As far as getting more sand in the holes I'd say it's pretty debatable.
Although we do have 3 full seasons on them and have had lots of use.
Reely like the little trollies for them.
First thing to remove.
Then weights.
Lay the parts out in the order removed.
Remove these 3 bearing bolts on both ends.
Next 3 pairs of these bolts.
Light tap and it should slide out easily.
I laid it in front like this.
Remove the drive coupler (in this case), You can take them off either end but I prefer to take them all off on the same side.
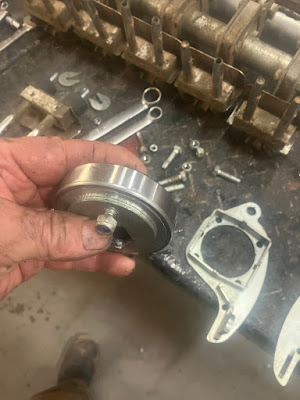
Just 3 bolts and nuts.
circlip will release the back half off nut.
A couple of wrenches to remove this nut.
Slide this bearing off and lay all the bits out in order.
The nut holding pinching all the tine holder to shaft I managed to get off this way, Blue Loctite was on this nut.
Spacer bushing slide off.
Put mine in front of frame as I rebuilt them.
Tines are timed so It's very important to mark these as their rebuilt.
They are already marked but I'm going to mark mine as I go.
Like this, mark them where that Allan bolt is near shaft.
Did mine one at a time so it had time to dry.
Removed these three brackets, pay attention they only go on one way. There is a difference.
All these washers were used on inside bearing races, some had 2 most had 1.
I'm thinking they are spacers or shims to keep bearings lined up for better rotation and less wear.
All the bearings by my thumb (upper one) were worn out.
Pay attention to tine orientation and also the bearing plates.
If you put them back wrong, you may make a lot more work for yourself never mind the damage they will do.
Remove the 2 nuts holding tine block on.
Set everything down the way it comes off.
This notch face down on tabletop before assembling on shaft.
Some spray 9 and water made quick cleanup work.
Remove Allan head bolts and nuts.
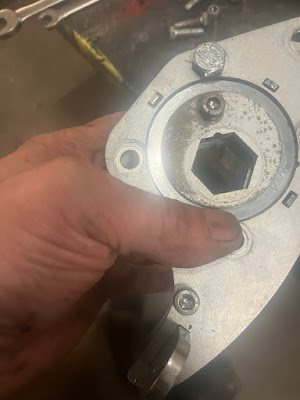
The one my middle finger is pointing at is the timing one that need to be facing the mark you made.
Remove the remaining 4 bolts and nuts along with the one bolt holding the separate bearing section.
Set the bearing a side as a separate rebuild piece.
Lay parts out for later.
After doing a few I wound up tearing down to this point then washing parts off.
A few pics of bolt removal below.
Split it in half to expose the bearing and outer race holders.
Think mechano set seems everything interlocks one way.
See how everything is notched.
Outer race holders are the same, they just pull apart.
If you have some bad wear on side plates for some reason you could just flip the plates to the other side.
Clean the side plates before assembling into a new bearing.
I worked on one half and started with installing tine mounting plate.
Like so.
Installing bearing side plates.
Allan head bolt was snugged down and made sure both plates where flush on bearing, may need a little tap.
Then back off nut a good turn, makes installing back on shaft a lot easier. You will have to snug it back up once its slid-on shaft.
Pops back in pretty easily.
I installed one bolt here by my thumb to help hold things together till rest get installed.
Installed the other Allen head bolt.
I don't think it makes a difference, but they had the bolts and nuts all facing the same way, so I did the same.
Make sure everything is in its place before tightening up.
Should all sit flush to bearings.
Remove the bolts that hold the bearings in place.
I replaced all the bearings and kept any good ones for a backup in case I needed them.
Also, this bearing was listed wrong in my parts book. IT IS A 6001 2RS bearing.
Not a reel tight fit, this worked great with an inverted socket.
All the bits back together.
VERY IMPORTANT TO REMEMBER THIS NOTCH.
This is what happens on bearing failure.
Did any repairs as I assembled.
And repeat 5 more times.
I left the finished on in its proper orientation.
Once I got to the last 2, I slid the rebuilt ones on lining up the marks to the Allan head bolts and then rebuilt the last 2 sections.


No comments:
Post a Comment